
Imagine the scent of fresh cedar and the cool, waxy resistance of vegetable-tanned leather under your palms. There is a specific kind of magic that happens when you stop fighting your materials and start listening to their structural language. When you are chasing a tolerance of less than half a millimeter, a graphite pencil is basically a blunt crayon. Using a Scratch Awl is the only way to achieve true precision because it does not just mark the surface; it severs the fibers. This tool is a surgical needle for your studio. It creates a physical channel that guides your chisel or blade with magnetic certainty. As you drag that hardened steel point across a grain, you feel the microscopic vibrations of the cellular walls. It is an intimate, tactile conversation between the tool and the workpiece. If you want your joinery to snap together with that satisfying "thunk," you have to stop drawing lines and start engraving them. We are talking about absolute geometric fidelity here.
THE STUDIO KIT
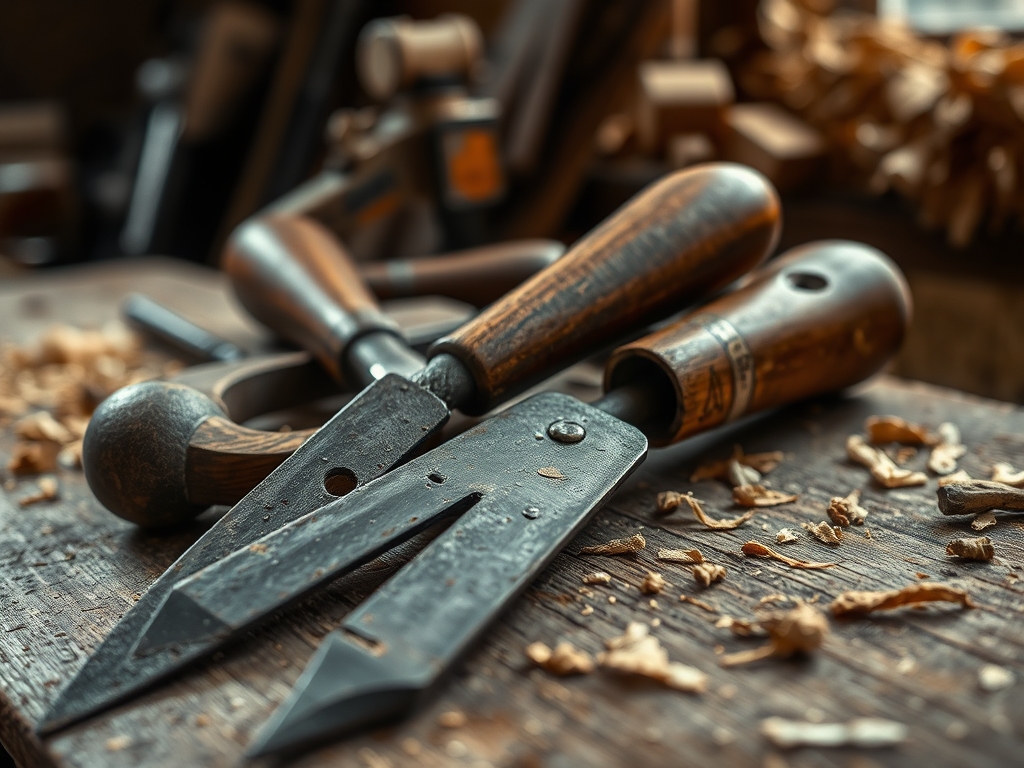
To master the layout phase, your bench needs to be a curated ecosystem of high-carbon steel and stable substrates. The scratch awl itself should have a comfortable, ergonomic handle; usually turned from a dense hardwood like cocobolo or maple to provide the necessary heft. You will also need a hardened steel machinist square to ensure your lines are perfectly perpendicular to the reference edge. For the material, start with a porous medium like 4-ounce tooling leather or a tight-grained hardwood like cherry. These materials have the tensile strength to hold a scribe line without crumbling.
If you are working on a budget, look into Material Substitutions. Instead of premium leather, use heavy-duty greyboard or recycled ply scraps to practice your scribing pressure. Instead of a professional machinist square, a high-quality aluminum speed square will suffice, provided you check it for true 90-degree accuracy using the 3-4-5 triangle method. Keep a bone folder nearby to burnish down any accidental marks, and a set of digital calipers to verify that your scribed distances match your technical drawings exactly.
THE TEMPO
The "Maker's Rhythm" is not about speed; it is about the synchronization of your breath and your hand. Layout is the slowest part of the process, consuming roughly 40 percent of your total project time. You should spend at least twenty minutes just calibrating your square and marking your primary datum lines. This is the "Adagio" phase where precision is paramount. Once the lines are set, the "Allegro" phase begins. This is where you use your rotary cutter or saw to follow those lines. Because the awl has already created a physical track, the cutting phase moves twice as fast as it would with a pencil line. You are not "searching" for the mark; your blade is locked into a groove. Total project time for a standard layout and cut-out is approximately ninety minutes.
THE CORE METHOD
1. Establish the Datum Edge
Every measurement must evolve from a single, perfectly flat reference point. Use your calipers to verify that your starting edge is straight. Place your square firmly against this edge, ensuring there is no light visible between the tool and the material.
Mastery Tip: This relies on the physics of surface contact. Any microscopic gap between your square and the edge will be magnified over the length of the scribe, leading to an angular error known as "run-out."
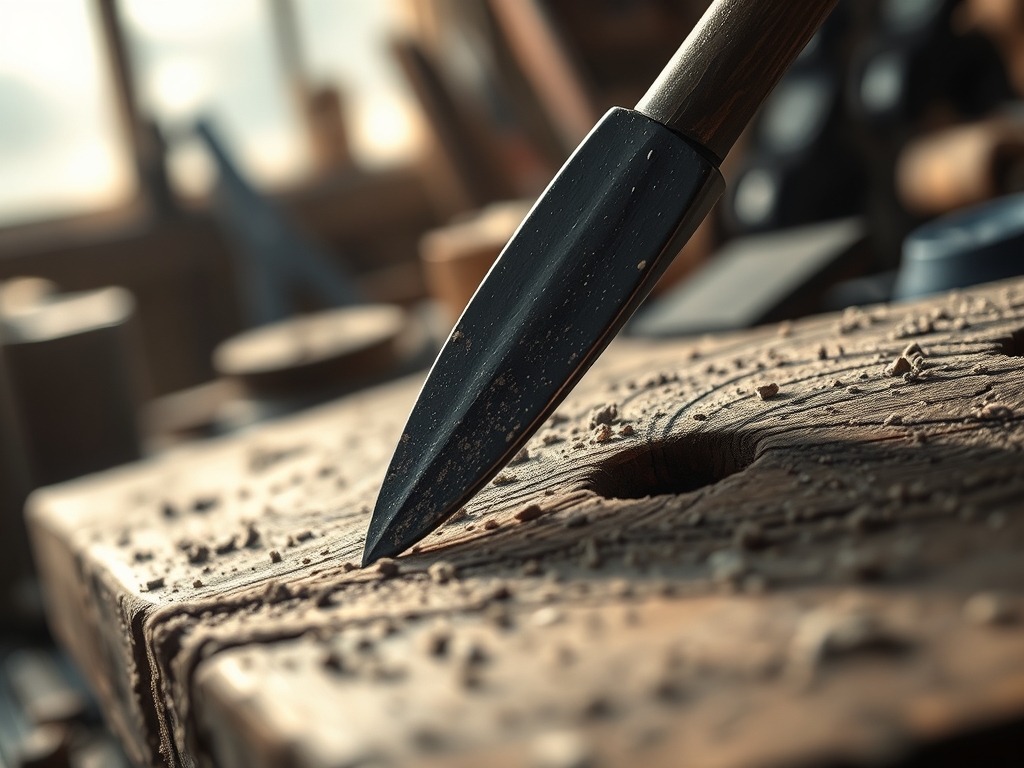
2. The Initial Scribe
Hold the awl like a pen but tilt it slightly away from the square. Apply consistent downward pressure and pull the tool toward you in one continuous motion. Do not "saw" back and forth. You are looking for a clean, singular displacement of material.
Mastery Tip: This process utilizes shear stress to part the fibers. By tilting the awl, you ensure the point stays tucked tightly against the fence of the square, preventing the tool from wandering along the grain.
3. Deepening the Track
For thicker materials like heavy gauge leather or oak, repeat the stroke a second time. This deepens the "V" groove, which acts as a mechanical guide for your subsequent cutting tools.
Mastery Tip: Deepening the track increases the capillary action if you were to apply a dye or finish later, but here it serves to lower the structural integrity of the waste side of the line, making the final cut effortless and straight.
4. Verification and Burnish
Before you move to the saw or knife, run your fingernail across the line. You should feel a distinct "click" as your nail drops into the groove. If you made a slight error, use your bone folder to burnish the fibers back into place before re-scribing.
Mastery Tip: Burnishing works by compressing the cellular structure of the material rather than removing it. This allows you to "erase" a shallow scribe mark without thinning the material.
THE TECHNICAL LEDGER
Maintenance & Longevity: Your scratch awl is a precision instrument. Never use it to pry or as a screwdriver. To maintain the point, "strop" it on a piece of leather loaded with polishing compound. This keeps the tip at a microscopic sharpness, reducing the drag as you scribe.
Material Variations:
- Sustainable: Use reclaimed cork or bamboo ply; these require a lighter touch to avoid splintering.
- Premium: Shell cordovan or exotic hardwoods offer the best "feedback" for an awl.
- Recycled: High-density polyethylene (HDPE) from old containers can be scribed, but the "burr" will need to be trimmed.
The Correction:
- The Wander: If the awl follows the grain instead of the square, your angle is too vertical. Fix: Use a jeweler's saw to lightly nick the start of the line to "seat" the awl.
- The Over-Scribe: If you mark past your corner. Fix: Dampen the area and use a warm oscillating tool with a flat buffing pad to swell the fibers back up.
- The Dull Point: If the line looks "fuzzy" rather than sharp. Fix: Re-grind the tip to a 25-degree cone using a fine-grit whetstone.
Studio Organization: Store your awl in a vertical rack or a dedicated tool roll. Never let the tip touch other metal tools. To prevent degradation of your layout work, store scribed materials in a climate-controlled area with consistent humidity to prevent the grain from shifting or "closing" the marks.
THE FINAL REVEAL
Look at those lines! When you use a scratch awl, the finished piece possesses a level of crispness that is simply unattainable with traditional marking methods. The corners are tight; the edges are flush; and the overall tactile quality of the work screams professional craftsmanship. You have moved beyond just "making a thing" and into the realm of engineering art. There is a profound sense of confidence that comes from knowing your layout is mathematically sound. Your hands might be tired, but your soul is soaring because those joints are going to fit like a glove.
STUDIO QUESTIONS
Why is a scratch awl better than a pencil?
A scratch awl creates a physical, three-dimensional groove in the material. This acts as a mechanical track for blades and chisels; ensuring absolute accuracy that graphite cannot provide. Pencils have thickness; which introduces a margin of error in high-precision joinery.
Can I use a scratch awl on metal?
Yes; but you must ensure the awl is made of hardened tool steel. On metal, it is often called a "scribe." It cuts through surface oxidation to leave a permanent mark that won't rub off during the machining or grinding process.
How do I stop the awl from slipping?
Ensure your "fence" or square is clamped tightly to the workpiece. Apply 70 percent of your pressure against the square and 30 percent downward. This lateral pressure keeps the point locked against your reference guide to prevent wandering grain lines.
What is the best handle material for an awl?
Dense hardwoods like Cocobolo or Lignum Vitae are ideal. These materials provide the necessary weight and ergonomic stability. A heavier handle lowers the center of gravity; which gives the maker better control over the tensile pressure applied during the scribe.

