Imagine standing in a frost-dusted forest, your fingers tracing the chaotic, swirling grain of a birch burl that looks like a frozen storm. This isn't just a lumpy growth on a tree; it is a dense, interlocking masterpiece of cellulose and lignin waiting to become your favorite vessel. Carving a Wooden Noggin is the ultimate test of a maker's patience and spatial reasoning because you are working against grain that refuses to follow the rules. Unlike straight-grained timber, a burl possesses incredible multi-directional tensile strength, meaning it won't split easily under the pressure of hot coffee or a rugged trek. When you hold that raw, heavy knot of wood, you feel the potential energy stored in its compressed fibers. We are about to transform this eccentric biological anomaly into a functional piece of art that fits perfectly in the palm of your hand. It is tactile, it is ancient, and it is about to become your obsession.
THE STUDIO KIT
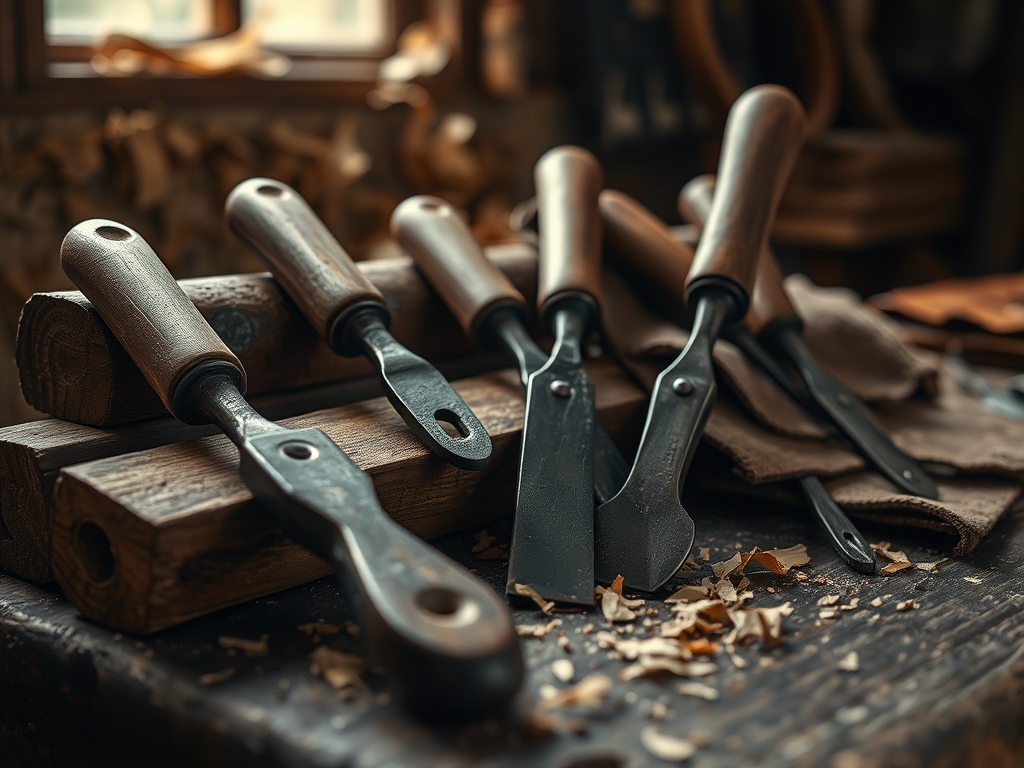
To master this build, you need a kit that respects the density of the material. Your primary weapon is a curved spoon knife or a scorp, which allows you to hollow out the interior bowl with a pivoting motion. For the exterior shaping, a high-carbon steel sloyd knife is essential because its Scandi-grind edge stays sharp against the abrasive silica often found in burl bark. You will also need digital calipers to monitor wall thickness; if the wood becomes too thin, it loses its structural integrity and may crack during the drying process.
For the finishing touches, keep a cabinet scraper and various grits of sandpaper nearby. If you cannot find a birch burl, your "Material Substitutions" include cherry or maple burls, which offer similar density. In a pinch, a thick crook of fruitwood provides a similar curved grain profile, though it lacks the iconic "birdseye" figure of a true burl. Always have a honing strobe and green chromium oxide paste on your bench; a dull blade is a dangerous blade when working with interlocking grain.
THE TEMPO
The "Maker's Rhythm" for a noggin is a slow, deliberate dance that spans several days or even weeks. You cannot rush the physics of moisture loss. The Rough-Out Phase takes about three to five hours of high-intensity carving where you remove 80 percent of the bulk while the wood is still "green" or wet. This is followed by the Stabilization Phase, where the piece must rest in a paper bag filled with its own shavings for five to ten days to slow down evaporation.
The Refinement Phase requires another four hours of delicate paring once the wood has reached equilibrium. Finally, the Curing Phase involves oiling and burnishing, which takes about thirty minutes of active work but requires twenty-four hours to polymerize. Respecting this tempo prevents the internal stresses of the wood from causing catastrophic "checks" or splits.
THE CORE METHOD
1. Mapping the Topography
Before the first cut, use a pencil to map the "face" of the burl. Locate the center of the growth and mark the diameter of your bowl. Use your calipers to ensure the handle orientation follows the strongest grain path.
Mastery Tip: By aligning the handle with the densest part of the burl, you leverage the wood's natural compressive strength. This ensures that the transition point between the bowl and the handle can withstand the leverage of a full cup of liquid without snapping.
2. The Interior Excavation
Secure the burl in a carving horse or vice. Use your spoon knife to begin the hollowing process. Work from the center outward, taking thin, curling shavings. Do not attempt to reach the final depth immediately; leave at least an inch of "meat" on the walls for now.
Mastery Tip: Focus on the shear angle of your blade. Because burl grain is non-linear, you must constantly change the direction of your cut to avoid "tear-out." If the wood feels fuzzy or jagged, you are cutting against the grain; rotate the piece 180 degrees to restore a clean, sliced surface.
3. Shaping the Ergonomic Exterior
Once the bowl is hollowed, switch to your sloyd knife to shape the outside. Follow the natural contours of the burl to minimize waste. The goal is to create a thin, uniform wall thickness that allows the wood to expand and contract evenly.
Mastery Tip: Aim for a consistent wall thickness of about 1/4 inch. This uniformity prevents differential drying, where thin sections dry faster than thick ones, creating the internal tension that leads to cracking.
4. Refining the Rim and Handle
Use a jeweler's saw or a fine-toothed hand saw to define the handle's silhouette. Use your knife to round over all sharp edges. A traditional noggin often features a "toggle" hole in the handle for a leather thong.
Mastery Tip: Be mindful of capillary action. The end-grain sections of the rim will absorb and release moisture much faster than the side-grain. Sanding these areas to a higher grit (up to 600) effectively "plugs" these microscopic tubes, slowing down moisture exchange.
5. The Final Burnish and Seal
Once the wood is bone dry, use a smooth stone or the back of a metal spoon to burnish the surface. This compresses the surface fibers, giving the wood a natural luster. Apply a food-safe finish like raw linseed oil or walnut oil.
Mastery Tip: The oil works through polymerization, where it reacts with oxygen to turn from a liquid into a solid, waterproof resin inside the wood's pores. This creates a permanent barrier that protects the vessel from staining and rot.
THE TECHNICAL LEDGER
Maintenance & Longevity: Never put your noggin in the dishwasher. The high heat and harsh detergents will strip the natural oils and cause the wood to warp. To maintain the piece, rinse it with lukewarm water after use and occasionally re-apply a coat of beeswax and mineral oil.
Material Variations:
- Sustainable: Reclaimed orchard prunings or "storm-fall" burls.
- Recycled: Large hardwood offcuts from furniture shops.
- Premium: Rare Amboyna or Walnut burls for high-contrast aesthetics.
The Correction:
- The Mistake: A small crack appears during drying. The Fix: Fill the void with a mixture of fine sawdust and food-safe wood glue, then sand flush.
- The Mistake: The bowl bottom is too thin. The Fix: Stop carving immediately and use a drill press with a depth stop to create a decorative "plug" of contrasting wood to reinforce the base.
- The Mistake: The handle feels bulky. The Fix: Use a rasp or oscillating tool to refine the ergonomics, focusing on the "pinch points" where your fingers naturally rest.
Studio Organization: Store your unfinished noggins in a "humidity box" (a plastic bin with a slightly damp towel) if you need to step away for more than a few hours. This prevents the wood from drying too quickly and losing its workability.
THE FINAL REVEAL
Look at that! You have successfully turned a gnarly, overlooked growth into a sophisticated piece of bushcraft gear. The way the light hits those swirling "eyes" in the grain is absolutely mesmerizing. It feels heavy, substantial, and warm to the touch, unlike a cold ceramic mug. Every time you take a sip from your hand-carved noggin, you are connecting with a tradition that spans centuries. It is not just a cup; it is a testament to your ability to see the beauty hidden inside the rough. Now, go brew some cedar tea and enjoy the fruits of your labor!
STUDIO QUESTIONS
How do I prevent my noggin from cracking?
Slow down the drying process by keeping the piece in a bag of its own wet shavings. This creates a high-humidity micro-environment that allows the internal moisture to equalize slowly, preventing the surface from shrinking faster than the core.
Is any wood burl safe to use for a cup?
No, avoid toxic species like Yew, Oleander, or certain Laburnums. Stick to "food-safe" hardwoods like Birch, Maple, Cherry, or Walnut. Always research the botanical toxicity of a species before it touches your lips.
What is the best oil for finishing a wooden noggin?
Raw linseed oil or walnut oil are the gold standards. They are drying oils, meaning they cure into a solid state. Avoid vegetable oils like olive or canola, as they can go rancid inside the wood fibers over time.
Can I use power tools for Carving a Wooden Noggin?
Absolutely! While traditionalists prefer hand tools, a rotary tool with a carbide burr or a power carver can speed up the hollowing process significantly. Just be careful not to generate too much heat, which can scorch the fibers.
Why is my burl wood so hard to carve?
Burls have interlocking grain, meaning the fibers grow in multiple directions. This makes them resistant to splitting but very difficult to slice cleanly. Keep your tools "scary sharp" to ensure you are cutting the fibers rather than tearing them.