
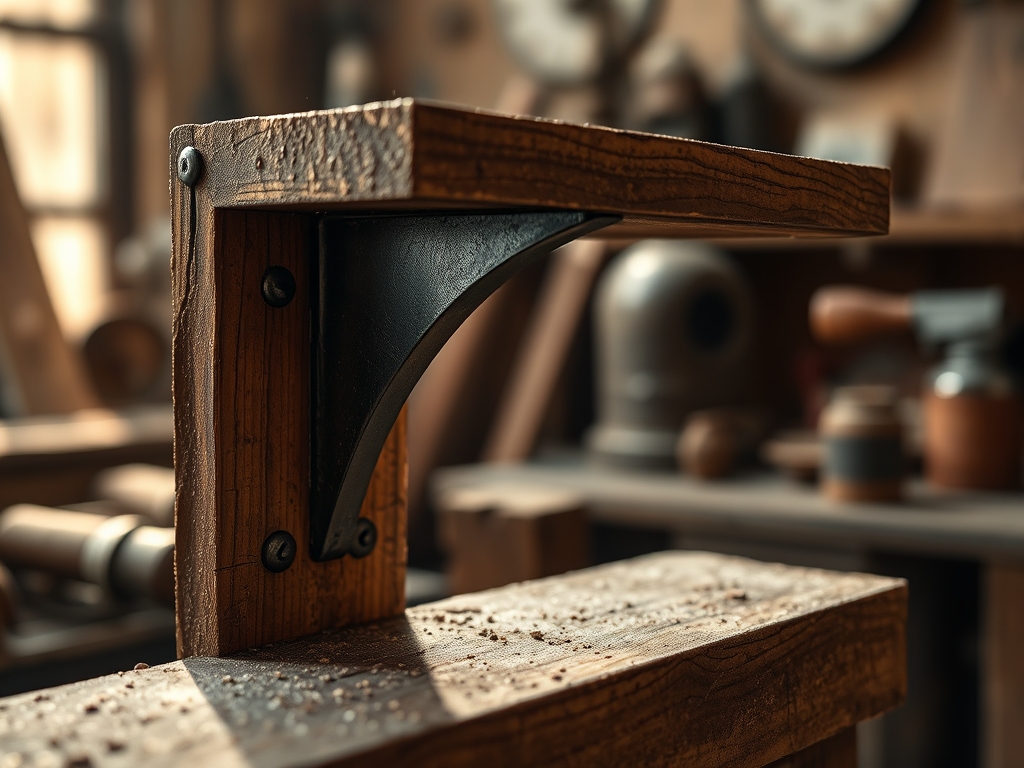
The smell of ozone and hot iron is basically my signature perfume at this point. My studio shelves are currently groaning under the weight of heavy reference tomes; I am talking massive leather bound volumes on structural engineering and vintage botanical illustrations that weigh more than a small dog. To save my drywall from a catastrophic failure, I realized that store bought hardware simply would not cut it. Forging a Metal Shelf Bracket is the only way to achieve the necessary tensile strength while maintaining that industrial chic aesthetic we both love. When you hold a raw bar of hot rolled steel, you can feel the potential energy waiting to be shaped. It is cold, stubborn, and unyielding until you introduce it to the forge. We are going to transform that rigid stock into a graceful, load bearing masterpiece that uses physics to defy gravity. Grab your safety glasses and let us get into the heat.
THE STUDIO KIT
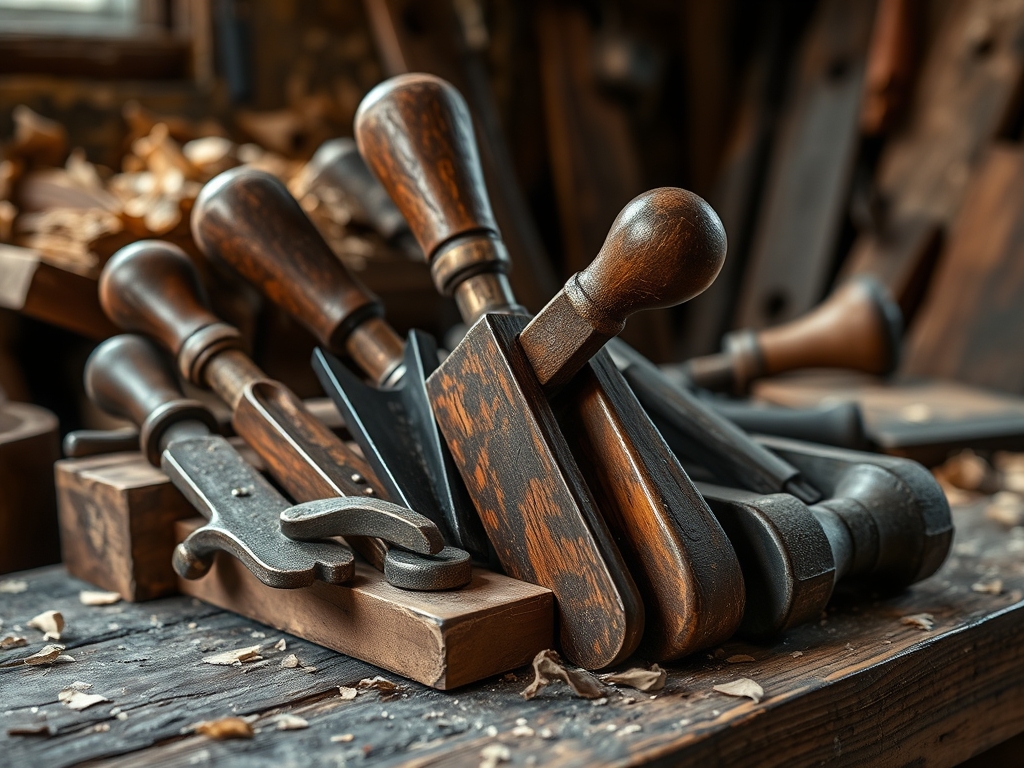
To master this build, you need a kit that respects the molecular structure of the metal. We are working with low carbon mild steel, specifically 1 inch by 1/4 inch flat bar stock. This gauge provides the perfect balance between workability and structural integrity. You will need a propane or coal forge to reach the critical temperature where the iron crystals rearrange into an austenitic state. For shaping, a 2.5 pound cross peen hammer is your best friend; its ergonomic weight allows for powerful strikes without destroying your wrist. You also need a hardened steel anvil with a clean horn for creating those tight radius curves.
Precision is non negotiable, so keep your digital calipers and a steel machinist square on the workbench. We will use a center punch and a drill press with cobalt bits to create the mounting holes. If you do not have a forge, a "Material Substitution" would be using a heavy duty oxy acetylene torch for localized heating, though it takes longer to reach a uniform soak. For the finish, we are using beeswax and linseed oil, which creates a polymer layer that prevents oxidation through a process called polymerization.
THE TEMPO
Forging is all about the Maker's Rhythm. You cannot rush the thermal mass of the steel. Expect to spend about 30 minutes on the "Initial Heat and Taper," where you define the decorative ends. The "Primary Bend" takes roughly 20 minutes of careful monitoring to ensure you do not create stress fractures in the heel. The "Support Gusset" is the most technical phase, requiring 45 minutes of fitting and welding or riveting. Finally, the "Finishing and Quenching" takes 20 minutes. Total active shop time is about two hours per bracket. The rhythm is a cycle of heat, strike, measure, and repeat. If you lose the beat, the metal cools, and you risk brittle failure.
THE CORE METHOD
1. The Decorative Taper and Scroll
We start by heating the end of the bar to a bright cherry red, approximately 1,500 degrees Fahrenheit. Using the cross peen hammer, strike the edge of the metal to draw it out, increasing its length while decreasing its thickness. This is known as plastic deformation. Once the tip is thinned, use the horn of the anvil to roll a small decorative scroll.
Mastery Tip: Always maintain a "soaking heat." If you strike the metal when it has faded to a dull red, you introduce internal micro cracks. The science here involves dislocation density; keeping the metal hot allows atoms to slide past each other without breaking the metallic bonds.
2. Executing the 90 Degree Heel Bend
Mark your bend line with a soapstone pencil. Heat a wide section of the bar to a yellow heat. Place the bar in a sturdy bench vise and use a heavy wrench or your hammer to pull the metal into a sharp right angle. Use your machinist square immediately to check the geometry.
Mastery Tip: To prevent the metal from thinning too much at the corner, perform a technique called upsetting. This involves striking the end of the bar vertically to push material back into the bend zone, ensuring the structural integrity of the corner remains high under heavy loads.
3. Fitting the Diagonal Gusset
A bracket is only as strong as its diagonal support. Measure the distance between the two legs and cut a smaller piece of 1/2 inch round stock. Use a jeweler's saw or a portable band saw for a clean miter cut. This piece will act as a compression member, transferring the weight from the horizontal arm back into the vertical wall mount.
Mastery Tip: This step relies on triangulation. By adding a third side to your right angle, you convert bending stress into compressive stress. Steel is incredibly strong in compression, which is why this small addition triples the weight capacity of your shelf.
4. Punching and Boring the Mounting Holes
Using your center punch, mark the locations for your lag bolts. Switch to the drill press. Start with a small pilot bit before moving to the final 5/16 inch cobalt bit. Use cutting fluid to reduce friction and heat buildup, which can dull your tools.
Mastery Tip: This is about stress concentration. Smooth, deburred holes prevent the metal from "tearing" under the tension of the bolt. Use a countersink bit to allow the bolt head to sit flush against the steel surface for a professional, ergonomic finish.
5. The Traditional Oil Finish
Once the forging is complete, wire brush the piece to remove fire scale (iron oxide). Heat the bracket one last time to a low blue heat and rub it down with a block of raw beeswax. The wax will melt and penetrate the porous surface of the hot metal.
Mastery Tip: This is a chemical reaction. The heat causes the wax to bond with the surface molecules, creating a hydrophobic barrier. Unlike paint, this finish will never chip or peel; it simply develops a rich, dark patina over time that highlights the hammer marks of your labor.
THE TECHNICAL LEDGER
Maintenance & Longevity: To keep these brackets in top shape, wipe them down with a light coat of mineral oil once a year. This prevents moisture from reaching the iron and starting the oxidation cycle.
Material Variations: For a premium look, you can use silicon bronze bar stock. It is more expensive but offers incredible corrosion resistance and a beautiful gold hue. For a sustainable option, source old leaf springs from a scrapyard; this is high carbon steel and requires more careful annealing but offers superior strength.
The Correction:
- The Over-Bend: If you go past 90 degrees, do not just hammer it back cold. Reheat the entire corner to avoid work hardening.
- The Slag Pit: If your anvil is dirty, you will forge scale into the surface. Use a "wet strike" (a drop of water on the anvil) to explode the scale away.
- Warped Legs: If the bracket twists, use a twisting wrench while the metal is at a dull red to realign the planes.
Studio Organization: Store your raw steel stock horizontally in a dry rack. Never lean it against a wall for long periods, as even heavy steel can take a permanent "set" or bow over time due to its own weight.
THE FINAL REVEAL
There is nothing quite like the feeling of bolting a custom forged bracket into a wall stud and knowing it could probably hold up a motorcycle. The texture of the hammer marks tells the story of the heat and the force you applied. These supports are not just functional; they are a testament to your skill as a maker. Your shop books are finally safe, cradled by hand forged steel that looks as smart and sophisticated as the knowledge contained in those pages. The dark, burnished finish catches the light perfectly, proving that heavy duty utility can also be high art.
STUDIO QUESTIONS
What is the best steel for beginners?
Low carbon mild steel is the gold standard. It is forgiving during the heating process, easy to weld, and widely available at hardware stores. It provides excellent tensile strength without the finicky heat treatment requirements of high carbon tool steels.
How do I prevent the metal from rusting?
Apply a traditional "blacksmiths finish" using beeswax or boiled linseed oil while the metal is still warm. This creates a durable, moisture resistant polymer coating that penetrates the surface pores and prevents the chemical reaction that causes rust.
Can I forge steel without a professional anvil?
Yes, you can use a large section of railroad track or a heavy block of scrap steel. The key is mass; the "anvil" must be heavy enough to reflect the energy of your hammer blow back into the workpiece.
Why did my bracket crack during the bend?
Cracking usually occurs because the metal was too cold during the shaping process. This is called "cold working." Always ensure the steel is at least a bright cherry red before attempting a sharp 90 degree heel bend.
What size bolts should I use for heavy books?
Use 5/16 inch diameter lag bolts that are at least 3 inches long. This ensures the bolt penetrates deep into the center of the wall stud, providing the necessary shear strength to support the weight of the steel and the books.

