
The air in the studio today smells like ozone and heavy industrial grease; it is the scent of pure potential. There is a specific, grounding weight to a bar of raw tool steel that makes your palms itch to get started. We are diving into the ultimate meta-project: Forging a Steel Punch Set. This is the foundation of a self-sustaining workshop where your hands create the very instruments that define your future precision. When you grip a piece of unworked W1 water-hardening rod, you are feeling the high carbon content waiting to be organized into a molecular lattice of incredible hardness. We are not just making sticks of metal; we are engineering force-multipliers. The tactile feedback of the cold steel against your skin is the first step in a journey of thermal transformation. It is time to stop buying mass-produced, soft-tempered tools that mushroom after three hits. We are going to craft something that lasts a lifetime; because the only thing better than a perfect project is the custom tool you built to finish it.
THE STUDIO KIT
To begin this transformation, we need materials that can withstand extreme tensile stress. Our primary medium is W1 or O1 tool steel. These alloys are prized for their high carbon percentage, which allows them to reach a Rockwell hardness capable of piercing milder metals without deforming. You will need a jeweler's saw with a 2/0 blade for precise initial cuts and a set of digital calipers to ensure your diameters are consistent to the thousandth of an inch.
For the shaping phase, an oscillating tool with a sanding attachment or a dedicated 2×72 belt grinder is essential. We will also utilize a propane forge or an oxy-acetylene torch to reach the critical temperature where the steel becomes non-magnetic. For the cooling phase, keep a gallon of engineered quenching oil or room-temperature water nearby.
Material Substitutions: If you cannot source virgin tool steel, look for old vehicle coil springs or high-quality lawnmower blades. These are often made from 5160 spring steel. While they require more effort to straighten, their tensile strength and fatigue resistance are legendary. Just avoid "mystery metal" from big-box hardware stores; that low-carbon mild steel will never hold an edge, no matter how hard you heat it.
THE TEMPO
The "Maker's Rhythm" for tool making is less about speed and more about thermal management. Expect to spend approximately four to six hours for a complete set of five punches. The first hour is the "Reduction Phase," where you cut and profile the stock. The second and third hours are the "Refinement Phase," involving the delicate grinding of the tapers and faces.
The final two hours are the "Transformation Phase." This is where the physics happens. You cannot rush the soak time in the forge. Steel has a specific thermal mass, and it needs time for the heat to penetrate the core evenly. If you quench too early, you risk a soft core and a brittle shell. If you temper too quickly, you won't properly relieve the internal stresses. Respect the cooling cycles; they are the heartbeat of the project.
THE CORE METHOD
1. Stock Preparation and Profiling
Begin by marking your tool steel into four-inch lengths using a scribe. Use your jeweler's saw to create clean, perpendicular cuts. Any deviation here will result in a punch that "walks" when you strike it with a hammer. Once cut, use a file to burnish the edges of the striking face. This prevents the steel from "mushrooming" or cracking under heavy impact later.
Mastery Tip: Always maintain the structural integrity of the striking end by adding a slight chamfer. This 45-degree bevel redirects the kinetic energy downward through the center of the tool rather than allowing it to dissipate across the outer edges of the face.
2. Tapering the Working End
Secure the steel in a vise and use an oscillating tool or a fine-grit belt to grind a long, even taper toward the business end. For a center punch, you want a 60-degree included angle. For a drift punch, the sides must be perfectly parallel. Use your calipers constantly to check for symmetry. A lopsided taper introduces lateral stress that will eventually snap the tool.
Mastery Tip: Watch the "spark stream" as you grind. Consistent, bright sparks indicate you are maintaining the carbon density of the surface. If the steel turns blue while grinding, you are overheating it and ruining the factory anneal; dip it in water frequently to keep it cool to the touch.
3. Reaching Critical Temperature
Heat the working tip of the punch in your forge until it reaches a cherry red color. Use a magnet to test the steel; when the magnet no longer sticks, you have reached the decortication point where the atoms rearrange into an austenitic structure. This is the moment of peak potential.
Mastery Tip: The science of thermal expansion means the tool is slightly larger at this temperature. Ensure your tongs have a secure, ergonomic grip so you can transition to the quench in under two seconds to "lock" the carbon atoms in place.
4. The Quench and Hardening
Plunge the heated tip vertically into your quenching medium. Move it in an up-and-down motion, never side-to-side. A side-to-side motion creates a steam pocket on one side of the metal, causing uneven cooling and warping. The goal is to transform the austenite into martensite, the hardest possible form of steel.
Mastery Tip: This process utilizes capillary action within the quenching oil to pull heat away from the metal rapidly. The vertical movement ensures the entire circumference of the punch cools at the exact same rate, preventing microscopic stress fractures.
5. Tempering for Toughness
A fully hardened punch is as brittle as glass. To make it useful, you must temper it. Clean the steel with sandpaper until it is shiny, then gently heat the shank (not the tip) until a "straw" or "bronze" color creeps down toward the point. Once the tip turns straw-yellow, quench it again to stop the heat soak.
Mastery Tip: Tempering is a trade-off between hardness and ductility. By allowing the straw color to reach the tip, you are sacrificing a tiny bit of hardness to gain the "springiness" required to survive a hammer blow without shattering.
THE TECHNICAL LEDGER
Maintenance & Longevity
To keep your punch set in professional condition, coat the tools in a thin layer of camellia oil or paste wax after every use. Steel is porous at a microscopic level, and moisture from your hands can trigger oxidation within hours. If the striking face begins to flatten, regrind the chamfer immediately to prevent dangerous steel shards from flying off during use.
Material Variations
- Sustainable: Upcycle old chrome-vanadium wrenches. They offer incredible tensile strength and are often discarded in bulk.
- Recycled: High-carbon railroad spikes can be forged into heavy-duty drifts, though they require significant "drawing out" on an anvil.
- Premium: S7 Shock-Resisting Tool Steel is the "gold standard" for punches that will see daily industrial use.
The Correction: Common Pitfalls
- The Warp: If your punch comes out of the quench looking like a banana, you likely quenched it at an angle. The Fix: Re-heat to red, let it air cool slowly (anneal), straighten it, and try the vertical quench again.
- The Shatter: If the tip breaks off during the first use, you skipped the tempering phase. The Fix: Regrind the tip, re-harden, and ensure you see that "straw" color before the final cooling.
- The Soft Point: If the punch dulls immediately, it wasn't hot enough during the quench. The Fix: Ensure you are checking with a magnet; if it sticks, it is too cold to harden.
Studio Organization
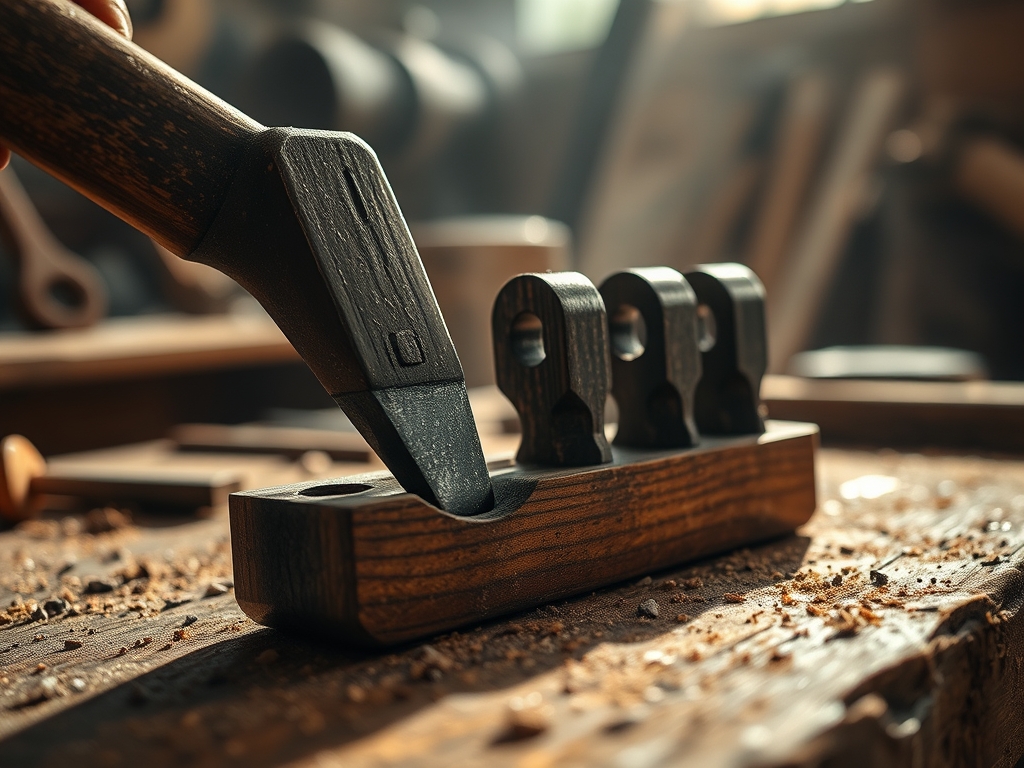
Store your custom punches in a wooden "tool block" with individual holes for each gauge. Avoid tossing them into a metal drawer where the hardened tips can clink against each other. This prevents "micro-chipping" of the edges and keeps your workspace looking like a high-end laboratory.
THE FINAL REVEAL
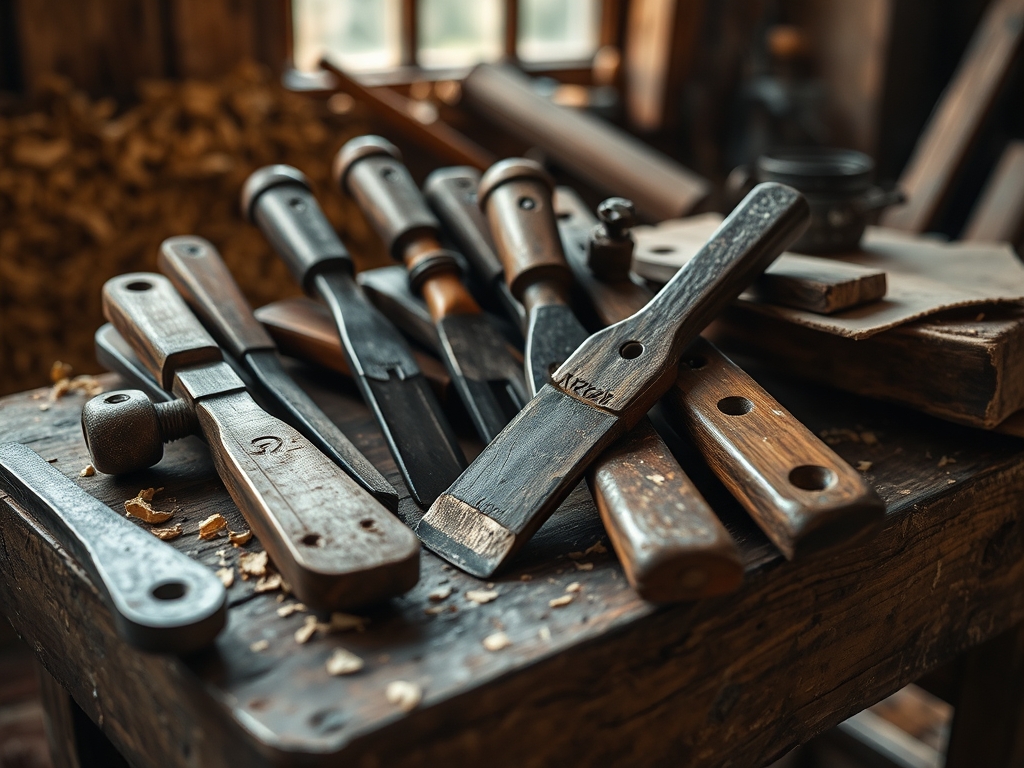
There is nothing quite like the "clink" of a hardened steel punch hitting a tabletop. When you finish this set, you will notice the weight feels different; it feels intentional. The surface should have a beautiful, matte-grey finish from the heat treatment, perhaps with a flash of bronze at the tip from the tempering process. These tools are now an extension of your intent. They are heavy, ergonomic, and infinitely more reliable than anything bought in a plastic blister pack. You have successfully navigated the physics of metallurgy to create the very things that will build your next masterpiece.
STUDIO QUESTIONS
What is the best steel for a beginner punch set?
W1 tool steel is the best choice. It is affordable, easy to machine with a jeweler's saw, and has a simple water-quench requirement that does not require expensive industrial oils to achieve professional-grade hardness.
Why did my punch tip turn blue during grinding?
The blue color indicates you have accidentally tempered the steel too far using frictional heat. This ruins the structural integrity of the edge. You must re-harden and re-temper the tool to restore its proper Rockwell hardness.
Can I use a regular propane torch for hardening?
Yes, for small diameter rods up to 3/8 inch. However, you must create a "firebrick forge" to trap the heat. Without it, the thermal mass of the steel will dissipate heat faster than the torch can provide it.
How do I know if my temper was successful?
A successful temper is visible through color. After cleaning the hardened steel to a shine, a light straw-yellow color indicates the perfect balance of tensile strength and hardness for high-impact tools like punches and chisels.
Is it necessary to chamfer the striking end?
Absolutely. A flat striking end will eventually "mushroom" and send steel splinters flying. A beveled or chamfered edge ensures the kinetic energy stays centered, protecting both the tool and your hands from injury during heavy use.

