
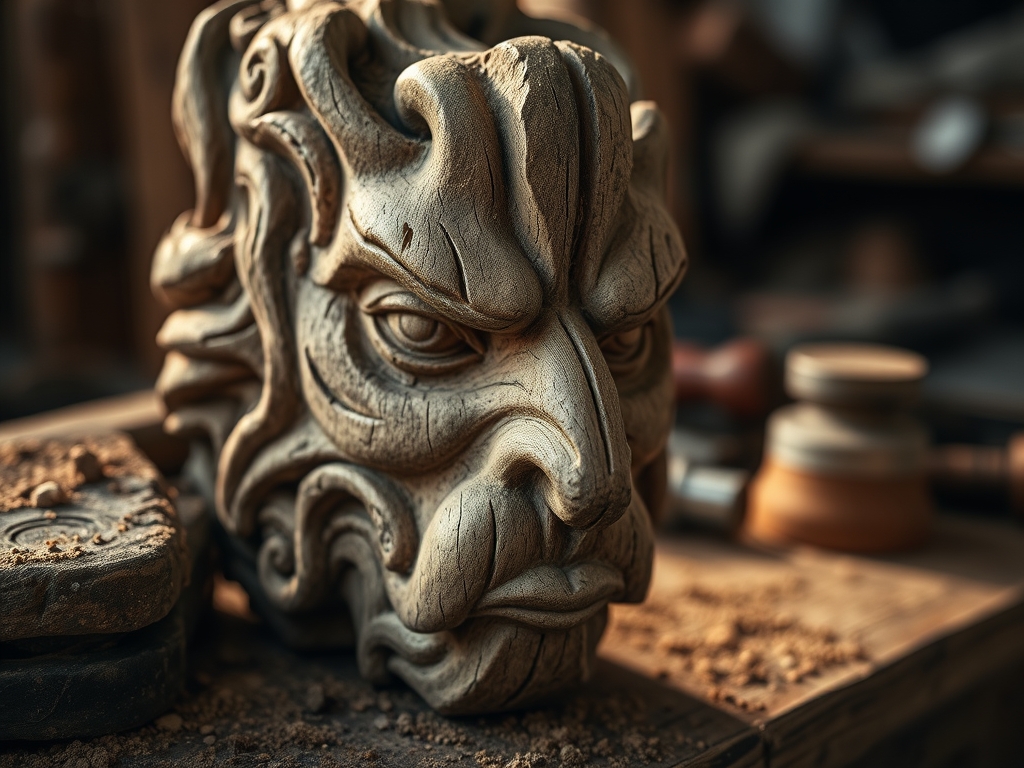
Close your eyes and listen to that crisp, rhythmic snap of a sharp blade meeting kiln dried wood. It is the sound of potential. When you are Carving a Spirit Face, you are not just hacking at a block; you are negotiating with the cellular structure of a living organism. Pine is a fascinating, temperamental beast because of its wide growth rings and the stark contrast between its soft springwood and dense, resinous latewood. You can feel that resistance change under your thumb as the steel glides through a soft section only to hit a hard, amber colored ridge. This is where the magic happens. We are taking a humble, discarded offcut from the workshop floor and coaxing out a personality that has been trapped in the fibers for decades. The smell of fresh resin fills the air, a sharp and citrusy reminder of the tree's chemical defense system. Grab your favorite bench knife and let us get tactile. We are about to turn a porous, mundane scrap into a legacy piece with nothing but physics and a little bit of creative grit.
THE STUDIO KIT
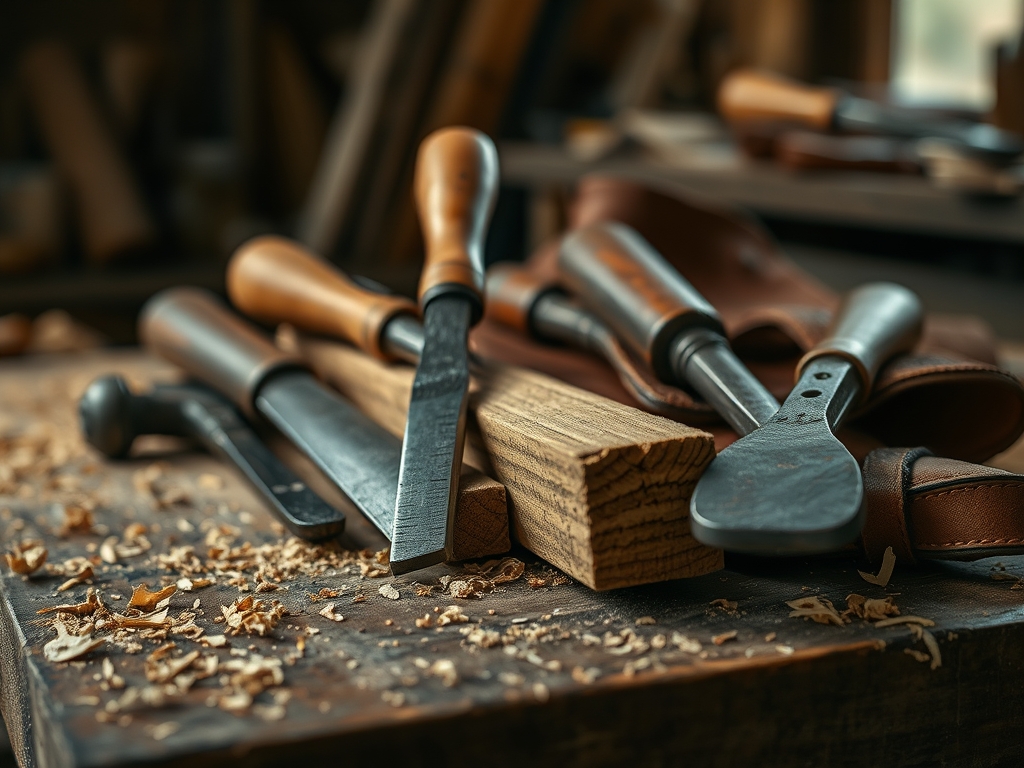
To master this project, your toolkit needs to be an extension of your own biomechanics. You will need a high carbon steel carving knife with an ergonomic handle to prevent carpal fatigue during long sessions. A V-tool or parting tool is essential for defining the deep shadows of the eyes and the bridge of the nose. For the finer details, a small detail gouge allows you to scoop out material without crushing the delicate tracheids of the pine. You should also have a leather strop loaded with chromium oxide polishing compound; a dull blade is a dangerous blade because it requires more force, increasing the risk of a slip.
If you cannot find a clean piece of white pine, consider Material Substitutions like basswood or butternut. Basswood is the gold standard for beginners because its grain is incredibly tight and uniform, offering almost zero resistance to the blade. Butternut, often called white walnut, offers a gorgeous tan color and a slightly more open grain that takes oil finishes beautifully. Avoid construction grade pressure treated lumber at all costs. The chemical salts used to prevent rot will dull your tools instantly and are toxic to inhale when the wood dust becomes airborne.
THE TEMPO
The "Maker's Rhythm" is all about respecting the wood's moisture content and your own mental focus. For a standard four inch spirit face, expect to spend about five to seven hours at the bench. The first hour is the Roughing Phase, where you remove bulk material to find the basic geometry of the skull. The next three hours are the Refinement Phase, where you define the brow, the nasolabial folds, and the mouth. This is the most taxing part of the process because it requires constant spatial awareness. The final two hours are dedicated to Detailing and Burnishing, where you add the wrinkles, the pupils, and the skin texture. Never rush the refinement phase. If you feel your shoulders tensing or your cuts becoming sloppy, step away. Wood carving is a marathon of precision, not a sprint of force.
THE CORE METHOD
1. Mapping the Topography
Before the first chip flies, use a soft lead pencil to map out the central axis of the face. Observe the grain direction on your scrap; you want the nose to run parallel to the grain to ensure the highest tensile strength for the most prominent feature. If you carve across the grain for the nose, it is liable to snap off with the slightest pressure.
Mastery Tip: Use a pair of calipers to ensure symmetry between the cheekbones. The science here involves bilateral symmetry, which the human brain perceives as a sign of health and vitality. Even a millimeter of deviation can make your spirit face look "off" to the observer.
2. Setting the Eye Line
Use your V-tool to cut a deep horizontal trench across the center of the block. This establishes the brow ridge and provides a shadow pocket for the eyeballs. You are essentially creating a structural shelf that will support the rest of the facial features.
Mastery Tip: This step relies on understanding light refraction. By creating a deep undercut, you ensure that ambient studio light cannot reach the back of the eye socket, creating a natural shadow that adds depth without the need for paint or stain.
3. Emerging the Nasal Bridge
Carve away the wood on either side of the center line below the eye shelf to reveal the nose. Start wide and taper down. Pine is anisotropic, meaning its strength varies depending on the direction of the grain. Always carve away from the "tip" of the nose toward the face to prevent the wood from splitting upward.
Mastery Tip: Pay attention to the shear strength of the pine. If you carve too deeply too quickly, the wood fibers will compress rather than cut, leading to "fuzzing." Keep your blade at a 15 degree angle to slice the fibers cleanly.
4. Defining the Oral Cavity
The mouth is a series of interconnected planes. Use a small gouge to tuck the corners of the mouth back into the cheeks. This creates a three dimensional wrap around effect that makes the face look like it has actual bone structure underneath the "skin."
Mastery Tip: This involves capillary action when you eventually apply a finish. The end grain inside the mouth will absorb more oil than the flat grain of the cheeks, naturally darkening the interior of the mouth and adding realistic depth.
5. Texturing and Wrinkles
Use the tip of your detail knife to add "character lines" around the eyes and forehead. Follow the natural flow of the wood grain to make these lines look like they grew there. Finally, use a smooth stone or a specialized bone folder to burnish the high points of the face.
Mastery Tip: Burnishing works by compressing the surface cells of the wood, making them denser and more reflective. This creates a natural highlights and lowlights effect that makes the spirit face pop under any lighting condition.
THE TECHNICAL LEDGER
Maintenance & Longevity: To keep your spirit face from cracking over time, you must control its environment. Wood is hygroscopic, meaning it constantly absorbs and releases moisture. Apply a coat of food grade mineral oil or beeswax to seal the pores. This slows down the exchange of moisture and prevents the internal stresses that cause "checking" or splitting.
Material Variations:
- Sustainable: Use fallen cedar branches from your backyard. The natural oils provide built in rot resistance.
- Recycled: Old piano keys or salvaged oak flooring offer incredible density but require much sharper tools.
- Premium: Black Walnut offers a rich, dark hue that needs no staining, though its dust is a known irritant.
The Correction:
- The Slip: If you carve off a piece of the nose, do not panic. Use a tiny drop of cyanoacrylate (CA) glue to reattach the chip immediately, matching the grain perfectly.
- The Tear: If the wood "tears" instead of cutting, your blade is dull. Stop and strop. You can sand out the tear using 220 grit sandpaper wrapped around a dowel.
- The Crack: If a natural check appears, embrace it. Fill it with a mixture of wood glue and fine sanding dust from the same block to create an invisible structural patch.
Studio Organization: Store your unfinished projects in a breathable cotton bag or a wooden drawer. Never store them in plastic bags, as this can trap moisture and lead to fungal growth or "spalting" which might ruin the structural integrity of your pine scrap.
THE FINAL REVEAL
Look at that! You have successfully transformed a flat, boring piece of lumber into a soulful entity with its own history and "attitude." The way the light catches those burnished cheekbones and the deep shadows of the eyes is pure studio magic. Your spirit face is no longer just a scrap; it is a testament to your understanding of wood anatomy and tool mastery. It has a weight and a presence that only handmade items possess. Whether it sits on a shelf or hangs in a garden, it carries the energy of the hours you spent negotiating with those pine fibers.
STUDIO QUESTIONS
How do I stop my pine from splintering?
Splintering usually occurs when you carve against the grain. Always observe the direction of the wood fibers and carve "downhill." Ensure your tools are razor sharp to slice through the lignin instead of tearing the cellular structure apart.
What is the best finish for a spirit face?
A simple mixture of beeswax and linseed oil is ideal. It penetrates the porous surface to highlight the grain while providing a protective, water resistant barrier. This finish is non toxic and allows the natural scent of the pine to linger.
Can I use a rotary tool instead of knives?
Yes, an oscillating tool or rotary carver with carbide burrs works well for roughing. However, you will lose the crisp, faceted look of hand tool joinery. Rotary tools also create fine dust that requires a high quality respirator and vacuum system.
How do I sharpen my carving tools?
Use a series of diamond stones or whetstones ranging from 1000 to 6000 grit. Maintain a consistent bevel angle, usually 20 degrees. Finish by stropping on leather with polishing compound to achieve a mirror finish that glides through dense wood grain effortlessly.

