There is a specific, jarring vibration that travels up your radius and ulna when a tool begins to fail. It is the sound of a steel head shifting just a millimeter against a dried out wooden eye; a hollow click that signals your swing is no longer true. You cannot ignore it. Fitting a Hammer Handle is not just a chore; it is a restoration of mechanical trust between your hand and the kinetic energy you are trying to direct. When the wood shrinks due to low humidity, the tensile strength of the friction fit evaporates. You feel that wobble in your palm before you see it with your eyes. We are going to fix this by utilizing the physics of expansion and the structural integrity of American hickory. We are not just shoving a stick into a hole; we are creating a permanent, pressurized bond that respects the grain of the wood and the forge of the steel.
THE STUDIO KIT
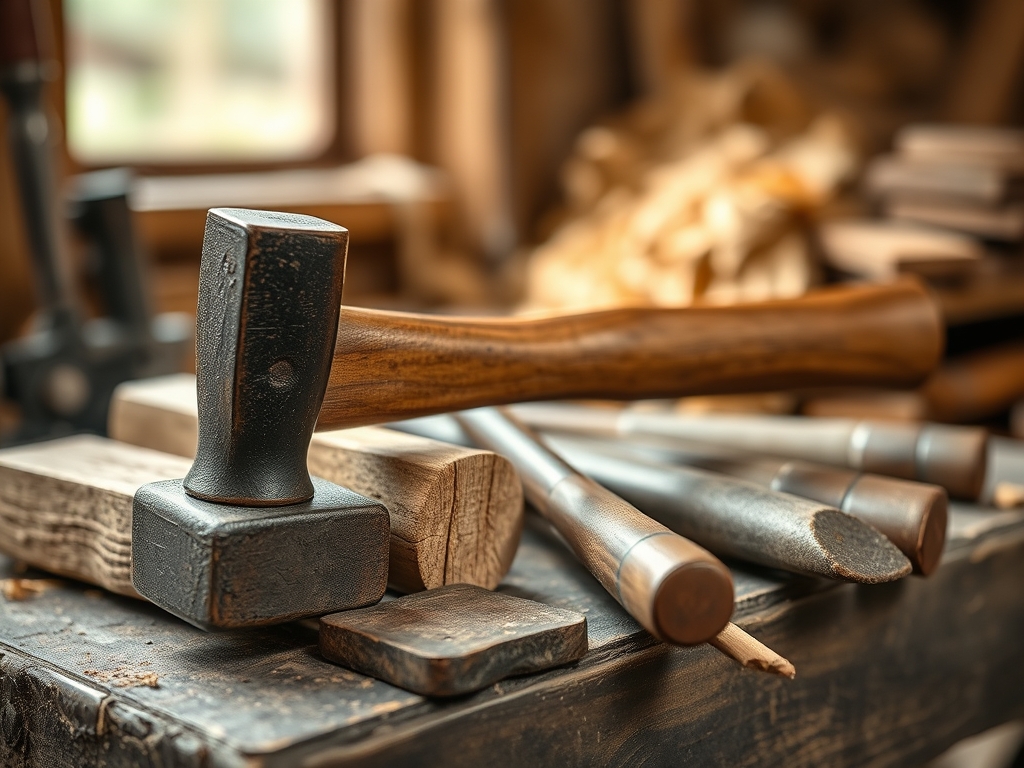
To execute this properly, you need more than just a mallet. Gather your calipers to measure the dimensions of the hammer eye; precision here prevents over-shaving the wood. You will need a high-quality replacement handle, preferably grade-A hickory with vertical grain orientation. For the shaping, a four-in-hand rasp or a fine-toothed wood file is essential. You also need a wooden mallet, a metal wedge, and a hardwood wedge. To ensure a permanent seat, keep some boiled linseed oil and a small bottle of wood glue nearby.
Material Substitutions: If you cannot find a hickory handle, ash is a suitable alternative due to its high shock resistance. If a metal wedge is missing, a heavy-duty steel washer cut in half can work in a pinch. For the lubricant, while linseed oil is the gold standard for its polymerization properties, any drying oil will assist in the slide without rotting the fibers.
THE TEMPO
The "Maker's Rhythm" for this project is deliberate and meditative. You cannot rush the seating process without risking a split in the grain.
Phase 1: Extraction (15 minutes). Removing the old, failed handle often requires drilling out the remaining wood.
Phase 2: Shaping (30 to 45 minutes). This is the high-focus zone where you rasp the wood to match the taper of the steel eye.
Phase 3: The Drive (10 minutes). The high-energy moment where kinetic force seats the head.
Phase 4: Wedging and Curing (20 minutes plus overnight soak). The final lock. Total active time is about 90 minutes, but the tool should rest for 24 hours to allow the wood to stabilize.
THE CORE METHOD
1. Clear the Eye
First, remove the remnants of the old handle. Use a drill to remove the core of the wood inside the head, then drive the remaining shell out with a drift punch. Technical Fact: Steel is significantly harder than wood on the Mohs scale, so you do not need to worry about damaging the interior of the eye with a standard drill bit.
Mastery Tip: Examine the interior of the hammer eye for burrs. Use a small round file to smooth any sharp edges. This ensures surface tension is distributed evenly across the wood rather than creating stress risers that lead to cracks.
2. Sizing the Tenon
Use your calipers to measure the narrowest part of the hammer eye. Transfer these measurements to the top of your new handle. Use your rasp to shave the wood down until the head can just barely start to slide onto the wood.
Mastery Tip: Always maintain the grain direction. You want the growth rings to run parallel to the direction of the strike. This orientation maximizes the modulus of elasticity, allowing the handle to flex slightly under impact rather than snapping.
3. The Shoulder Fit
Continue rasping the handle into a slight taper. You want the head to stop about half an inch above its final resting place. Use a pencil to mark where the head stops; this is your "shoulder." Shave the wood below this line to create a clean transition.
Mastery Tip: This is about interference fit. By leaving the wood slightly oversized, the steel head will compress the outer layers of cellulose fibers as it is driven down, creating a microscopic "lock" that prevents lateral movement.
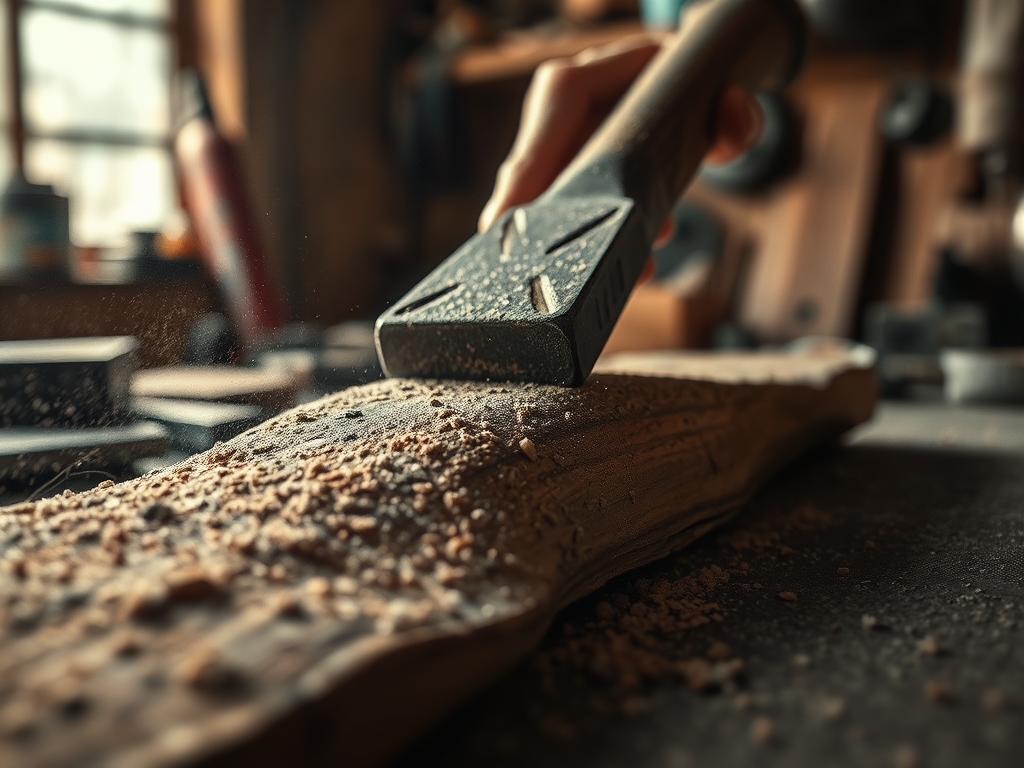
4. Driving the Head
Turn the handle upside down so the head is hanging toward the floor. Strike the butt end of the handle sharply with a heavy wooden mallet. The momentum of the steel head will pull it up onto the taper.
Mastery Tip: This utilizes Newton's First Law of Motion. The sudden stop of the handle forces the heavy head to continue moving downward onto the wedge-shaped tenon. This "dead blow" method is far more effective than hitting the steel head directly.
5. Setting the Wedges
Once the head is seated, saw off the excess wood protruding from the top, leaving about an eighth of an inch. Drive a hardwood wedge into the pre-cut kerf. Finally, drive a metal wedge diagonally across the wood wedge.
Mastery Tip: The wood wedge provides lateral expansion, while the metal wedge provides diagonal compression. This creates multi-directional structural integrity, ensuring the wood cannot shrink enough to become loose again.
THE TECHNICAL LEDGER
Maintenance & Longevity: To keep your hammer in peak condition, rub the handle with boiled linseed oil every few months. This prevents the wood from becoming porous and absorbing moisture, which causes the wood to swell and then shrink, eventually loosening the fit.
Material Variations:
- Sustainable: Look for FSC-certified hickory.
- Premium: Flame-treated handles offer a hardened exterior surface that resists splintering.
- Recycled: Old shovel handles can be turned down on a lathe to create custom hammer grips.
The Correction: Common Mistakes
- The Over-Shave: If you rasp too much wood, the head will bottom out. Fix: Use a thin shim of veneer and wood glue to build the thickness back up before re-seating.
- The Split Kerf: If the wedge is too thick, the handle might split below the head. Fix: Drill a tiny "stop hole" at the base of the saw kerf to dissipate pressure.
- The Loose Metal Wedge: If the metal wedge pops out, it means the wood is too dry. Fix: Soak the top of the hammer in linseed oil for 48 hours to swell the fibers permanently.
Studio Organization: Store your hammers in a climate-controlled area. Avoid high-heat zones like the top shelf of a garage, as extreme heat leaches the natural oils from the wood, leading to brittleness and failure.
THE FINAL REVEAL
There is nothing quite like the first swing of a newly hung hammer. The vibration is gone, replaced by a solid, satisfying thud that resonates with the quality of your craftsmanship. The handle feels like an extension of your own arm; balanced, ergonomic, and incredibly strong. You have taken a tool that was destined for the scrap heap and restored its kinetic potential. This is the heart of the maker movement; understanding the physics of your tools so you can build the world around you with confidence.
STUDIO QUESTIONS
How do I know if the handle grain is good?
Look at the end of the handle. The grain lines should run vertically, aligned with the hammer head. This orientation provides the highest tensile strength and prevents the wood from snapping during heavy prying or high-impact strikes.
Can I use epoxy instead of a wood wedge?
While epoxy creates a strong bond, it is permanent and brittle. A wood wedge allows for natural expansion and contraction. Using a wedge is the professional standard because it maintains structural integrity while allowing for future handle replacements.
What is the best way to remove a broken handle?
Clamp the hammer head in a vise. Use a drill with a high-speed steel bit to remove as much wood as possible from the eye. Then, use a hammer and a punch to drive the remaining wood out.
Why does my hammer head keep coming loose?
This is usually caused by "compression set." When wood gets wet and then dries, the fibers crush and do not bounce back. Regular applications of boiled linseed oil will seal the wood and prevent this cycle.