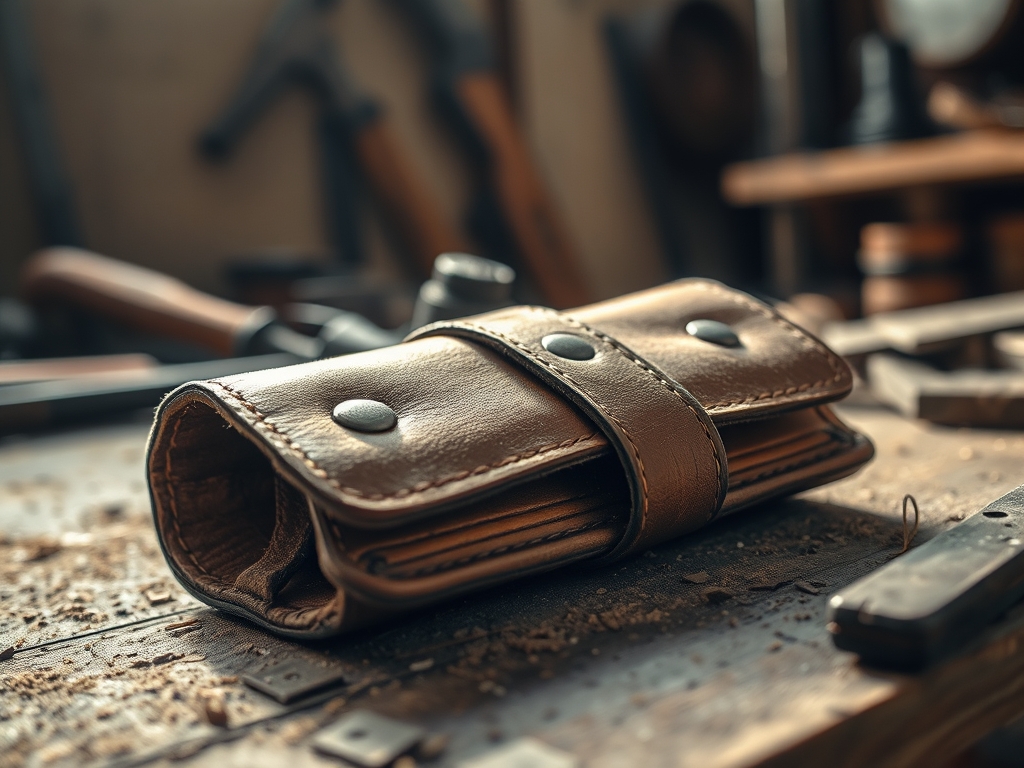
Imagine the scent of oak tannin and the cool, oily weight of high carbon steel resting against your palm. There is a specific, grounding frequency in the workshop when your tools are cared for, but nothing ruins that harmony faster than a chipped bevel or a rusted edge. Making a Leather Tool Roll is the ultimate act of gear stewardship. It is not just about aesthetics; it is about managing the micro-climate of your blades. Leather is naturally porous, and when treated with the right oils, it acts as a breathable barrier that wicks moisture away while providing a shock-absorbing cradle for your sharpest assets. We are talking about five ounce vegetable tanned hide that feels stiff at first but yields to the shape of your chisels over time. This project is where physics meets fashion. We are balancing the tensile strength of the hide against the piercing pressure of a saddle stitch. Grab your coffee and clear your workbench; we are about to build a piece of studio armor that will outlive us both.
THE STUDIO KIT
To execute this build, we need materials that respect the laws of friction and durability. Start with a side of **vegetable tanned leather**, preferably between 4 and 6 ounces in weight. This thickness provides enough structural integrity to prevent a sharp chisel from piercing the grain while remaining flexible enough to roll. You will also need **waxed polyester thread**, which has a higher tensile strength than cotton and resists rot. For the hardware, solid brass rivets or a simple leather thong will suffice.
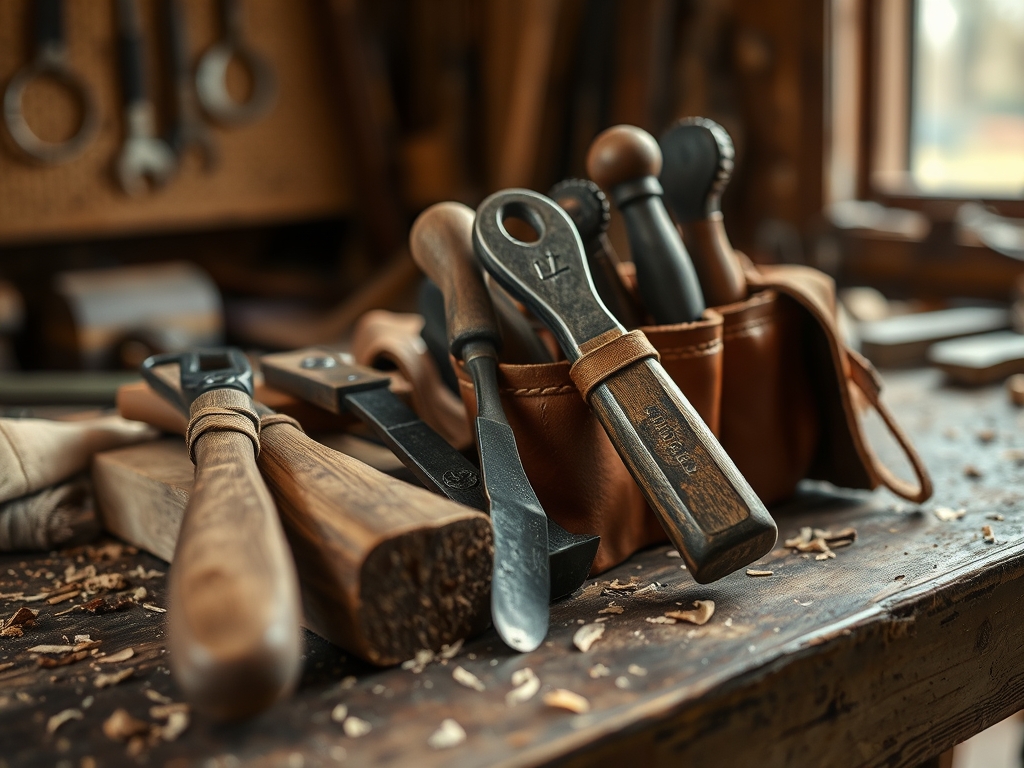
Your technical arsenal should include a rotary cutter for clean, linear edges and a stitching pony to hold the workpiece steady. We will use diamond chisels (the punching tool, not the woodworking kind) to create consistent apertures for the thread. A bone folder is essential for creasing the fold lines, and a scratch awl will be our primary marking tool.
Material Substitutions: If leather is not your vibe, you can swap the hide for heavyweight waxed canvas. While canvas lacks the natural oils of leather, its tight weave provides excellent abrasion resistance. For the thread, if you cannot find waxed polyester, use a heavy nylon cord, but ensure you singe the ends with a lighter to prevent unravelling.
THE TEMPO
The Maker's Rhythm is a three act play: Preparation, Execution, and Finishing. Expect to spend approximately ninety minutes on the Mapping Phase, where we calculate the width of each chisel handle using calipers. The Perforation Phase is the most rhythmic and time consuming part of the process; expect two hours of steady hammering as you punch through the hide. Finally, the Saddle Stitching Phase takes about three hours. It is a meditative, repetitive motion that requires consistent tension to ensure the seams do not pucker. Total project time is roughly six to seven hours. Do not rush the stitching; the structural integrity of the roll depends on the uniformity of your thread tension.
THE CORE METHOD
1. Dimensioning and Layout
Use your calipers to measure the widest part of each chisel handle. Add a half inch of "ease" to each pocket to account for the thickness of the leather as it curves over the tool. Mark your cut lines on the flesh side of the leather using a scratch awl.
Mastery Tip: Remember the concept of displacement. When you wrap a flat piece of leather around a three dimensional object, the inner circumference is shorter than the outer. Always add a buffer to your measurements to prevent the pockets from being too tight to use.
2. Cutting the Main Body
Line up your steel ruler and use a sharp rotary cutter to slice the main rectangular body and the interior pocket strip. Ensure your blade is perpendicular to the mat to avoid beveled edges that will make the seams look sloppy.
Mastery Tip: Leather has a grain direction. Try to cut your long horizontal strips parallel to the spine of the hide, as this area has the least amount of "stretch," ensuring your tool roll stays rectangular over years of use.
3. Burnishing the Edges
Before assembly, rub the top edges of the pockets with a wooden burnisher and a bit of water or gum tragacanth. This uses friction to heat the fibers, causing them to mat together and create a smooth, rounded edge.
Mastery Tip: This process relies on thermal friction. By compressing the fibers, you create a sealed edge that prevents moisture from entering the internal structure of the leather, which stops premature rot.
4. Punching the Stitch Lines
Glue the pocket strip to the main body using a thin layer of contact cement. Once dry, use your diamond chisels and a poly mallet to punch holes through both layers. Keep the tool perfectly vertical.
Mastery Tip: Consistent aperture alignment is key. If your punch tilts even slightly, the exit hole on the back will be misaligned, leading to a weak and crooked saddle stitch that could fail under the weight of heavy steel tools.
5. Executing the Saddle Stitch
Cut a length of thread four times the length of the seam. Thread a needle on both ends. Pass one needle through the first hole, then pass both needles through every subsequent hole from opposite sides, creating an "X" pattern inside the leather.
Mastery Tip: This technique utilizes mechanical interlocking. Unlike a machine lockstitch, if one thread breaks in a saddle stitch, the other thread remains trapped by the friction of the leather, preventing the entire seam from unraveling.
THE TECHNICAL LEDGER
Maintenance & Longevity
To keep your tool roll in peak condition, apply a light coat of neatsfoot oil or beeswax conditioner every six months. This maintains the moisture content of the fibers and prevents the grain from cracking. Store the roll in a cool, dry place. If the leather gets wet, do not use a hair dryer; let it air dry slowly to prevent the collagen fibers from shrinking and becoming brittle.
Material Variations
For a Sustainable approach, look for "deadstock" leather from upholstery shops. For a Premium build, use Shell Cordovan for the closure straps; it is incredibly dense and will never stretch out. If you want a Recycled version, old fire hoses or heavy denim can be layered and stitched using the same logic, though you will need to finish the edges with bias tape.
The Correction: Common Pitfalls
- The Tight Pocket: If you forgot to add ease and the chisel won't fit, do not panic. Dampen the leather with warm water, force the tool inside, and let it dry. The leather will permanently deform to the shape of the tool.
- The Snapped Thread: If your thread breaks mid stitch, backstitch three holes and start a new thread. Never knot the thread on the surface; hide the ends between the layers of leather.
- Uneven Edges: If your layers shifted during stitching, use a belt sander or fine sandpaper to level the edges, then re-burnish. This is a standard professional trick to hide minor alignment errors.
Studio Organization
Store your finished tool roll vertically or flat; never stack heavy objects on top of it, as this can compress the leather and cause the oil to migrate, potentially leaving spots on your tool handles.
THE FINAL REVEAL
Look at that! You have successfully engineered a custom housing for your chisels. The way the leather yields to the roll and the satisfying "clunk" of the tools settling into their pockets is pure maker magic. This roll is more than storage; it is a testament to your precision. As the leather patinas and darkens with age, it will tell the story of every project you have tackled. You have moved beyond just "buying stuff" and into the realm of "building the things that build the things." That is a powerful place to be.
STUDIO QUESTIONS
Why use vegetable tanned leather for tool rolls?
Vegetable tanned leather is processed with natural tannins rather than harsh chromium salts. Chrome tanned leather can actually corrode steel over time, whereas "veg-tan" is pH neutral and safe for long term tool contact.
How do I prevent my chisels from cutting the bottom of the roll?
You can stitch a small "welt" or a third strip of leather into the bottom seam. This acts as a sacrificial barrier that the sharp edge hits before it can reach your structural stitching.
Can I make this without a stitching pony?
Yes, but it is difficult. You can use a bench vise with wood scraps to protect the leather, or simply sit on the piece to hold it steady. The goal is keeping both hands free for the needles.
What is the best thread weight for this project?
A 0.8mm or 1.0mm waxed polyester thread is ideal. It is thick enough to fill the holes made by the stitching chisels, providing a water resistant seal and a bold, professional aesthetic.
How do I clean the leather if it gets sawdust on it?
Use a soft horsehair brush to whisk away debris. For deeper grime, a damp cloth with a tiny bit of saddle soap works wonders. Always re-condition the leather after using any soap to restore lost oils.