
Imagine the scent of freshly churned cream meeting the sharp, sweet aroma of green wood. There is a specific kind of magic that happens when your hands connect with a raw billet of timber to create something functional. We are diving deep into the physics of friction and fluid dynamics today. Carving a Butter Paddle is not just about making a kitchen utensil; it is about engineering a surface that can manipulate lipids without sticking. You want a tool that feels like an extension of your own palm. When you hold a piece of hard maple or cherry, you are feeling the tensile strength of cellulose fibers that have spent decades resisting the wind. We are going to harness that structural integrity to create a thin, resilient blade capable of pressing out every last drop of buttermilk. Grab your apron and clear the workbench. We are about to turn a block of wood into a masterpiece of ergonomic utility.
THE STUDIO KIT
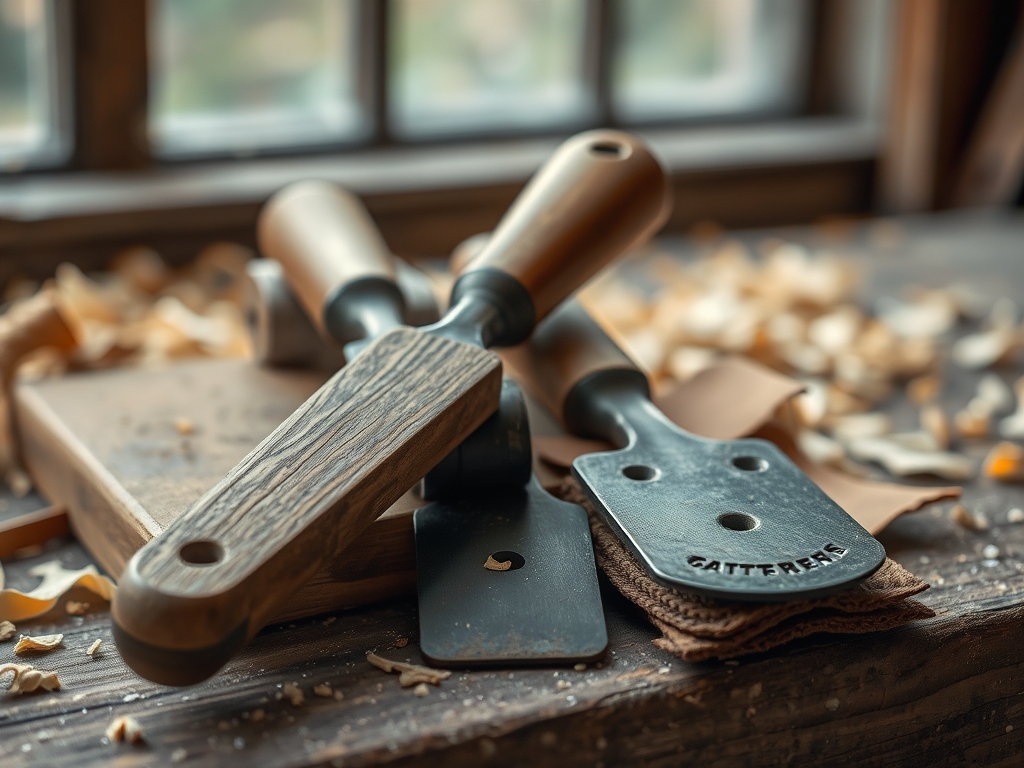
To master this build, you need a kit that respects the grain direction of your medium. Your primary weapon is a high carbon steel carving knife with a scandi grind; this geometry allows for precise control when paring away thin shavings. You will also need a drawknife for rapid bulk removal and a set of calipers to ensure the blade thickness remains consistent across the face. For the finishing touches, keep a burnishing tool or a smooth river stone nearby to compress the surface fibers.
The material choice is critical. You must use a diffuse-porous hardwood like Sugar Maple, Black Cherry, or European Beech. These woods have small, evenly distributed pores that prevent butter fats from turning rancid inside the grain. Avoid oak or ash; their large vessels act like straws for bacteria. If you cannot find a fresh kiln-dried plank, a Material Substitution would be a high-density bamboo laminate, though it lacks the soulful tactile feedback of solid timber. You will also need various grits of sandpaper, ranging from 80 to 400, and a food-grade finish like raw linseed oil or beeswax.
THE TEMPO
The "Maker's Rhythm" is a three-act play. Act One is the Rough-In, which takes about forty minutes of high-energy exertion as you use a hatchet or drawknife to find the silhouette. Act Two is the Refinement, a meditative ninety-minute session where you use your carving knife to establish the bevels and handle contour. Finally, Act Three is the Hydration and Honing, which spans twenty-four hours. This includes "raising the grain" with water, sanding it back down, and applying multiple coats of oil. Total active bench time is roughly three hours, but the wood dictates the final pace.
THE CORE METHOD
1. Mapping the Grain
Before the first cut, use a pencil to trace your template onto the wood, aligning the long axis of the paddle with the vertical grain direction. This ensures maximum tensile strength so the paddle does not snap under the pressure of working heavy cream. Use your calipers to mark the center line along the edge of the board.
Mastery Tip: Understanding anisotropy is key here. Wood is much stronger along the grain than across it. By aligning the paddle neck with the longitudinal fibers, you prevent structural failure at the narrowest point of the tool.
2. The Rough Reduction
Secure your wood in a vice and use a drawknife to remove the "waste" wood outside your pencil lines. Work in long, confident strokes, always cutting "downhill" with the grain to avoid tear-out. You are looking to create a rectangular blank that tapers from a thick handle down to a thin, wedge-shaped blade.
Mastery Tip: This stage relies on leveraging mechanical advantage. By keeping your elbows tucked and using your core muscles to pull the knife, you maintain a consistent angle, which prevents the blade from diving too deep into the heartwood.
3. Shaping the Bevels
Switch to your carving knife to refine the paddle face. You want to create a slight convex curve on the working surface. This shape allows the paddle to "roll" over the butter, which aids in the expulsion of moisture. Use a spokeshave for the transition between the handle and the blade to ensure a smooth, ergonomic grip.
Mastery Tip: The physics of surface tension comes into play here. A perfectly flat paddle creates a vacuum seal with the butter, making it hard to lift. A slight curve breaks that tension, allowing for a cleaner release during the "working" phase of butter making.
4. Refining the Texture
Sand the paddle starting with 80 grit and moving up to 220. Once smooth, wipe the wood with a damp cloth. This is called "raising the grain." The water causes the crushed wood fibers to swell and stand up. Once dry, sand them off with 400 grit for a glass-like finish that will stay smooth even after getting wet in the kitchen.
Mastery Tip: This process manages capillary action. By pre-swelling the fibers and cutting them back, you ensure the wood won't become "fuzzy" or rough when it encounters the liquid buttermilk during use.
5. The Final Burnish and Seal
Apply a generous coat of food-grade oil. After it soaks in, use a burnishing tool or a smooth bone folder to rub the surface of the wood vigorously. This compresses the outer cells, creating a natural, hydrophobic barrier that is incredibly resistant to staining.
Mastery Tip: Burnishing increases the surface density of the wood. By physically crushing the surface cells, you create a mechanical seal that prevents fats from penetrating deep into the cellular structure of the timber.
THE TECHNICAL LEDGER
Maintenance & Longevity: Never put your paddle in the dishwasher. The high heat and harsh detergents will strip the natural oils and cause the wood to check or warp. Instead, rinse with cool water and a mild soap; re-oil every few months to maintain the hydrophobic barrier.
Material Variations: For a premium version, use Curly Maple. The "chatoyancy" or shimmering effect in the grain provides a stunning visual, though the interlocking fibers are harder to carve. For a sustainable route, reclaim offcuts from local furniture makers; just ensure the wood was never treated with toxic stains.
The Correction:
- The Snap: If the handle breaks, it is usually due to grain run-out. Fix this by reinforcing the next build with a thicker "neck" transition.
- The Fuzz: If the wood feels rough after washing, you skipped the grain-raising step. Sand it back down, wet it, and sand again.
- The Warp: If the blade curls, the wood was too "green" or wet. Store it in a flat press while it finishes drying to pull it back to level.
Studio Organization: Store your unfinished blanks in a breathable canvas wrap. This prevents rapid moisture loss which leads to cracking. Keep your finished paddles hanging on a pegboard to allow 360-degree airflow, preventing any residual moisture from pooling.
THE FINAL REVEAL
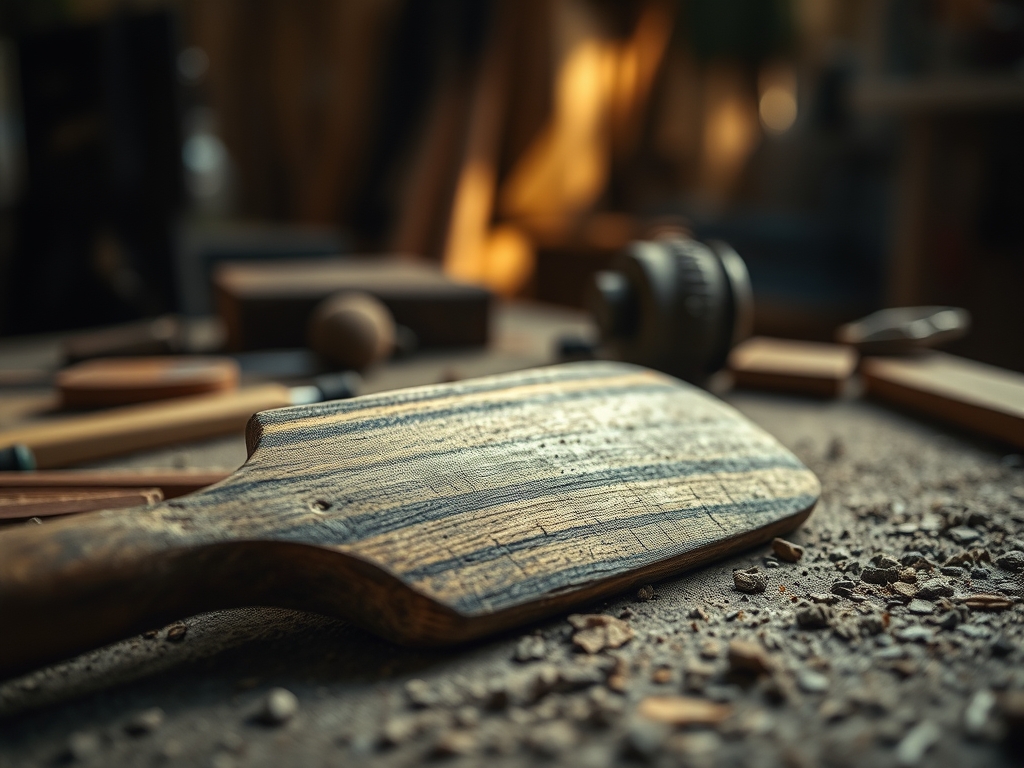
Look at that finish! Your butter paddle should feel like a piece of polished silk in your hand. The way the light catches the burnished grain shows off the hard work you put into the refinement stage. This is not just a tool; it is a piece of functional art that bridges the gap between the forest and the table. When you use this to press and shape a fresh batch of butter, you will feel the difference that ergonomic design and proper material science make. It is sturdy, sleek, and ready for a lifetime of service.
STUDIO QUESTIONS
What is the best wood for a butter paddle?
Hard, diffuse-porous woods like Maple or Cherry are best. They have tight grain structures that resist absorbing fats and bacteria, ensuring the tool remains sanitary and durable over years of heavy kitchen use.
Why does my paddle feel rough after it gets wet?
This happens because the wood fibers swell when exposed to moisture. To fix it, you must "raise the grain" during the sanding process by wetting the wood and sanding the raised fibers flat.
Do I need to use a specific oil for finishing?
Yes, use only food-safe oils like raw linseed, walnut, or mineral oil. Avoid "drying oils" with chemical accelerators or vegetable oils that can turn rancid over time within the wood pores.
How thin should the paddle blade be?
Aim for a taper that ends at about one-eighth of an inch at the tip. This provides enough tensile strength to move heavy butter while remaining thin enough to slice and shape the fats effectively.

