
Listen to that. That crisp, rhythmic snap as the blade glides through a fresh hide of vegetable tanned leather is the ultimate siren song for any maker. We are not just building a container for your cards; we are engineering a legacy piece that defies the bulk of modern mass production. When you commit to Hand Stitching a Wallet, you are engaging with the specific tensile strength of bovine fibers. You can feel the density of the grain under your fingertips. It is oily, firm, and smells like an old world library. My goal for this minimal front pocket carry was simple: eliminate the fluff and focus on the architecture. We are talking about a silhouette so slim it disappears into your jeans, yet so structurally sound it could survive a decade of friction. Every millimeter of this design is calculated to minimize pocket bulge while maximizing the tactile joy of high quality leather. Grab your coffee and clear your workbench. We are about to turn a flat sheet of organic material into a three dimensional masterpiece of utility.
THE STUDIO KIT
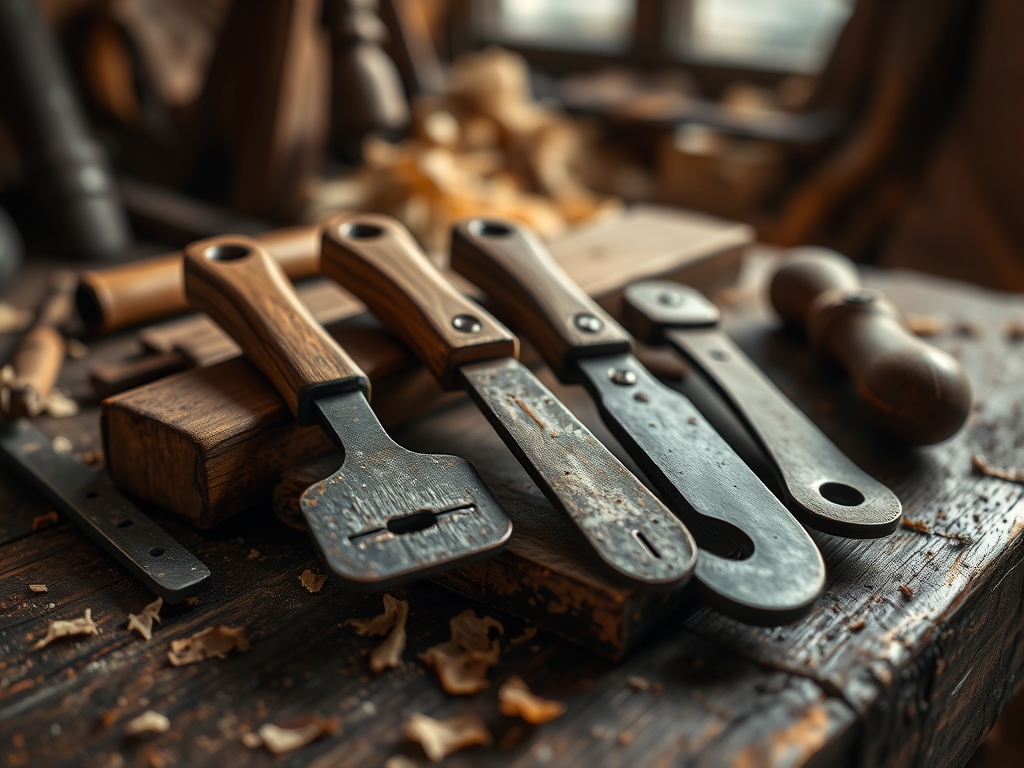
To achieve professional results, your kit must prioritize precision over quantity. We start with 3oz Vegetable Tanned Leather, which offers the perfect balance of flexibility and rigidity. You will need a rotary cutter with a fresh tungsten carbide blade to ensure clean, non-frayed edges. For the layout, digital calipers are non-negotiable; they allow you to measure the exact thickness of your leather to account for the fold radius. Your stitching kit should include a diamond awl, two blunt-tip harness needles, and 0.6mm braided polyester thread. This thread is superior to cotton because its synthetic nature prevents rot from sweat and moisture.
Material Substitutions: If you cannot source traditional veg-tan, look for recycled leather fiberboard for a vegan alternative, though it lacks the self-healing properties of full grain hide. For thread, you can substitute waxed dental floss in an absolute emergency, but be warned: the low melting point of the wax will cause it to gum up your stitch holes during high friction use. Always use a bone folder to compress the fibers at the fold line, which increases the density of the leather and prevents the grain from cracking.
THE TEMPO
The "Maker's Rhythm" is a psychological state where the mechanical repetition of the craft aligns with your focus. Hand Stitching a Wallet is not a race; it is a series of controlled movements. Expect to spend approximately 45 minutes on the layout and cutting phase. This is the most critical stage because an error of even one millimeter will cause the pockets to misalign during the final assembly.
The punching and preparation phase takes about 30 minutes. This involves using a stitching chisel or awl to create the path for your thread. Finally, the saddle stitching phase requires roughly 60 to 90 minutes. This is where the rhythm truly takes over. The consistent pull of the thread creates a mechanical bond that no sewing machine can replicate. Because a saddle stitch uses two independent needles passing through the same hole, the seam will not unravel even if a single stitch is severed.
THE CORE METHOD
1. Precision Geometry and Cutting
Start by transferring your pattern onto the flesh side of the leather using a scratch awl. Use your rotary cutter against a stainless steel ruler to make swift, confident passes. Mastery Tip: Always cut on a self-healing mat to maintain the blade's edge. The physics of the cut relies on shear force; if your blade is dull, it will compress and distort the leather fibers rather than severing them, leading to an uneven edge that is impossible to burnish.
2. The Fold and Crease
Use your bone folder to score a light line where the wallet will fold. Dampen the grain slightly with a sponge to make the collagen fibers more pliable. Mastery Tip: This process utilizes capillary action to draw moisture into the core of the hide, allowing the fibers to stretch without snapping. Once folded, apply pressure to set the "memory" of the leather, ensuring the wallet stays slim when empty.
3. Creating the Stitch Path
Mark your stitch line exactly 3mm from the edge using a wing divider. Use your stitching chisel and a poly mallet to punch through the layers. Mastery Tip: Ensure the chisel is perfectly vertical. If the tool enters at an angle, the exit holes on the reverse side will be misaligned, compromising the structural integrity of the seam and creating a zigzag pattern that looks amateurish.
4. The Saddle Stitch Execution
Thread your needles and begin the figure-eight motion of the saddle stitch. Keep your tension consistent on every single throw. Mastery Tip: This is about friction management. If you pull too hard, you will pucker the leather; too loose, and the cards will eventually stretch the seam. The goal is to seat the thread firmly into the groove created by your stitching chisel.
5. Edge Burnishing and Finishing
Sand the edges with 400-grit sandpaper until the layers look like a single piece of wood. Apply a small amount of Tokonole or beeswax and rub vigorously with a wooden slicker. Mastery Tip: The heat generated by friction causes the tannins and fibers to fuse together, creating a glass-like edge that seals the internal structure from moisture and oils.
THE TECHNICAL LEDGER
Maintenance & Longevity: To keep your minimal carry in peak condition, apply a light coat of neatsfoot oil every six months. This restores the internal lipids that keep the leather supple. Avoid over-stuffing the pockets, as leather has "plastic deformation" properties; once stretched beyond its elastic limit, it will not return to its original shape.
Material Variations: For a premium upgrade, consider Shell Cordovan. It is sourced from the fibrous flat muscle of a horse's hindquarters and is virtually non-porous. For a sustainable route, cork fabric offers a unique texture, though it requires a smaller needle gauge to prevent tearing.
The Correction:
- The Wonky Stitch: If your stitches look uneven, you likely switched the order of your needles. Always pass the left needle through first, then the right, to maintain a consistent "cast."
- The Rough Edge: If burnishing fails, your sanding was insufficient. Go back to a lower grit and ensure the edge is perfectly flat before applying friction.
- The Tight Pocket: If cards won't fit, you forgot to account for the "turn of the cloth." Next time, add 2mm to the width for every 3mm of leather thickness.
Studio Organization: Store your leather flat in a climate-controlled environment. UV light degrades the natural tannins, causing "sunburn" or discoloration. Keep your needles in a magnetized tray to prevent loss and store your awls in a wooden block to protect the delicate tips from dulling.
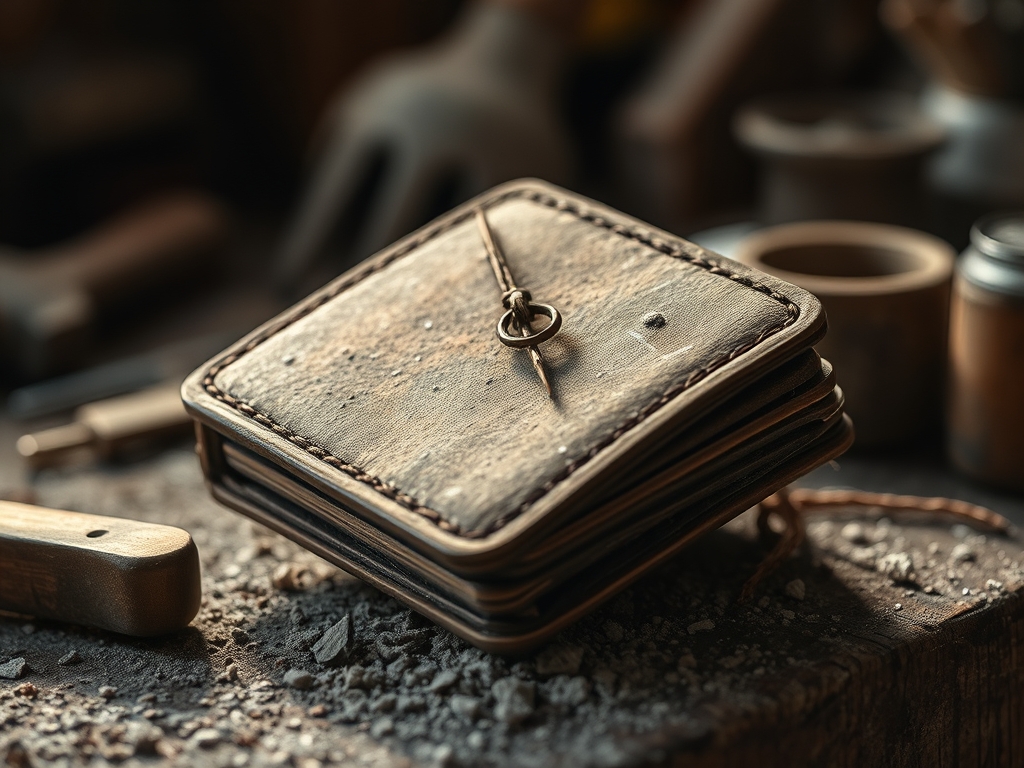
THE FINAL REVEAL
There it is. Hold it in your hand and feel that weight. It is slim, purposeful, and incredibly satisfying. The way the light catches the burnished edges proves that you didn't just make a wallet; you mastered a craft. This minimal carry is a testament to the beauty of hand-stitching. It feels substantial because it is built on the laws of physics and the patience of a true maker. Slip your ID and your primary card inside; notice how the leather grips them with just the right amount of tension. You are ready to head out with the leanest, smartest kit on the block.
STUDIO QUESTIONS
What is the best leather weight for a slim wallet?
A weight of 3oz (1.2mm) is ideal. It provides enough tensile strength to hold stitches securely while remaining thin enough to stack multiple layers without creating excessive bulk in your front pocket.
Why use a saddle stitch instead of a sewing machine?
A saddle stitch uses two needles to create an interlocking pattern. If one thread breaks, the other remains intact. Machine stitches use a lockstitch which can completely unravel if a single loop is snagged or cut.
How do I stop my thread from tangling while stitching?
Run your thread through a block of natural beeswax before starting. This coats the fibers, reducing static and friction as the thread passes through the leather, which prevents bird-nesting and knots during the stitching process.
Can I use chrome tanned leather for this project?
You can, but it is much harder to burnish the edges. Chrome tanned leather is chemically processed to be soft and does not respond to friction-based heat like vegetable tanned leather does, often requiring edge paint instead.

