
Grab your coffee and lean in because we are about to talk about the absolute royalty of the workshop: the marriage of sand-cast brass and vegetable-tanned leather. There is a specific, heavy click when a solid brass tongue hits a buckle frame that a cheap, zinc-alloy mass-produced version simply cannot replicate. We are not just making a strap to hold up your jeans; we are engineering a legacy piece. When you start Hand Stitching a Belt, you are engaging with a craft that relies on the incredible tensile strength of bovine fibers and the chemical stability of copper-based alloys. You can feel the weight of the brass in your palm; it is cool, dense, and ready to oxidize into a beautiful patina over the next decade. This is about more than fashion. It is about the physics of friction and the way a hand-sewn saddle stitch locks every single fiber into a permanent, unyielding bond. We are building something that laughs at the concept of planned obsolescence.
THE STUDIO KIT
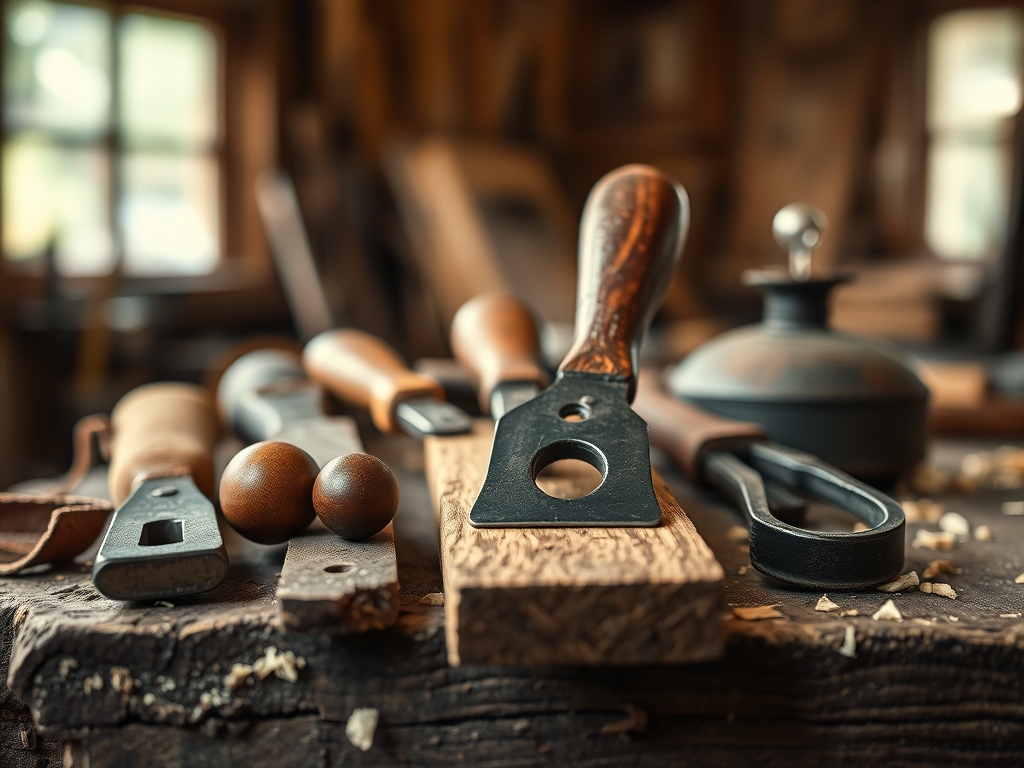
To execute this project with professional precision, your workbench needs to look like a high-end laboratory. We start with a 9-ounce vegetable-tanned leather strap. At this thickness, the collagen fibers are densely packed, providing the structural integrity needed to support a heavy buckle without stretching. You will need a solid brass heel-bar buckle, chosen for its high copper content which ensures it wont snap under sudden kinetic load.
For the joinery, grab your diamond-point awl and a pair of John James saddlers needles. We use 0.8mm waxed polyester thread because, unlike cotton, it resists rot and has zero stretch. Your measurement tools are non-negotiable: use stainless steel calipers for marking your stitch lines and a poly mallet to drive your punches. If you are looking for Material Substitutions, you can swap the brass for stainless steel if you prefer a silver aesthetic, but ensure it is 316 grade to prevent corrosion. If veg-tan leather is unavailable, a heavy-duty synthetic BioThane can work, though it lacks the porous nature required for a traditional burnish.
THE TEMPO
Creating a masterpiece takes exactly as long as the physics require. Expect to spend about four to six hours in the "Maker's Rhythm." The first hour is the "Prep Phase," where you are squaring ends, skiving the fold to reduce bulk, and punching holes. This is followed by the "Stitch Marathon," which takes roughly three hours. This is the meditative core of the process where your muscle memory takes over. Finally, the "Finishing Hour" involves edge painting or burnishing. The rhythm is dictated by the resistance of the leather; you cannot rush a burnish because the friction-generated heat needs time to melt the waxes into the leather fibers.
THE CORE METHOD
1. Skiving the Fold
We begin by using a French skiver to thin the "turnback" area where the leather wraps around the buckle. You want to reduce the thickness by about fifty percent. This is not just for aesthetics; it reduces the mechanical stress on the leather fibers when they are bent at a sharp 180-degree angle.
Mastery Tip: The science here is all about grain compression. By thinning the flesh side of the leather, you allow the grain side to wrap smoothly without cracking, maintaining the structural integrity of the outer fibers.
2. Scribing the Stitch Groove
Using your calipers or a stitching groover, cut a shallow channel exactly 4mm from the edge. This channel protects the thread from abrasion. If the thread sits proud of the surface, it will rub against your belt loops and eventually fray.
Mastery Tip: Creating a groove utilizes surface tension management. By recessing the thread, you ensure that the friction of daily wear is absorbed by the leather shoulders rather than the thread itself.
3. The Saddle Stitch Execution
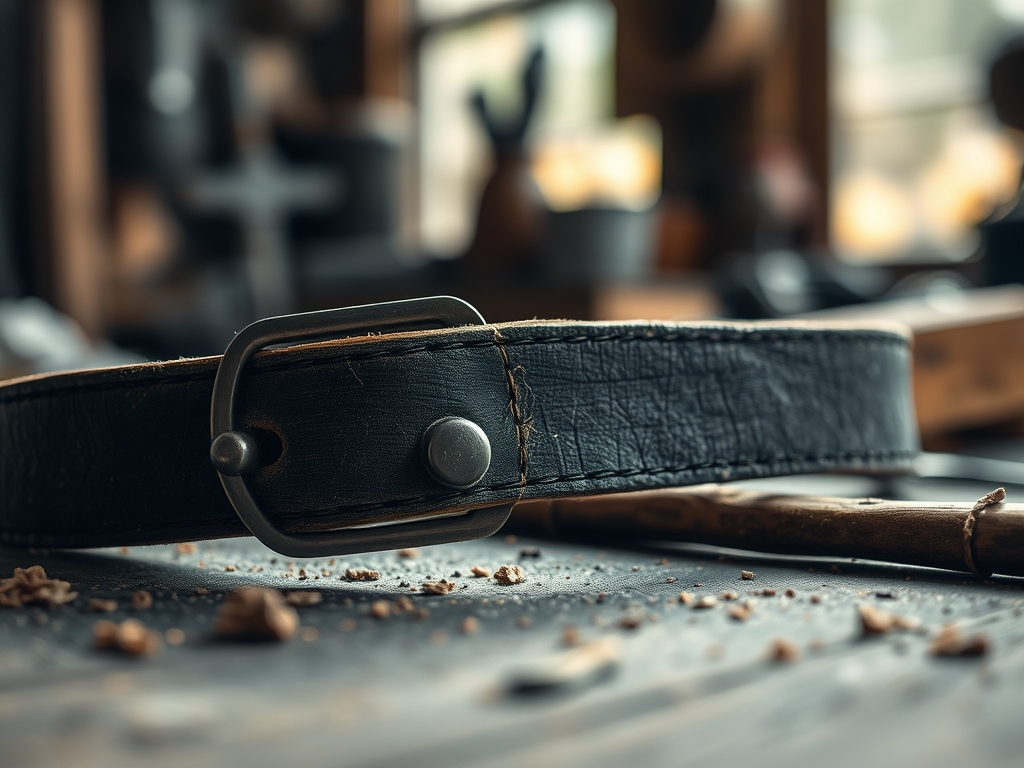
This is the heart of Hand Stitching a Belt. Unlike a sewing machine which uses a lockstitch, a saddle stitch uses two needles on a single thread passing through the same hole from opposite directions. If one thread breaks, the other remains locked in place.
Mastery Tip: This relies on interlocking friction. The wax on the thread acts as a lubricant during the pass-through but then acts as an adhesive once the stitch is pulled taut, "locking" the fibers together.
4. Burnishing the Edges
Apply a small amount of Tragacanth gum or water to the edges and rub vigorously with a wooden slicker. The heat generated by the friction fuses the loose protein fibers together into a smooth, glassy surface.
Mastery Tip: This is a localized thermoplastic reaction. The heat and pressure reorganize the collagen molecules, creating a sealed edge that prevents moisture from entering the porous internal structure of the leather.
THE TECHNICAL LEDGER
Maintenance & Longevity: To keep your brass gleaming, a simple wipe with a microfiber cloth is usually enough. For the leather, apply a high-quality neatsfoot oil once a year to keep the fibers supple. This prevents the "dry rot" that occurs when the natural oils evaporate.
Material Variations: For a sustainable twist, look for "Oak Bark Tanned" leather, which uses ancient pit-tanning methods with local timber. For a premium upgrade, use Shell Cordovan for the keeper loop; it is the most non-porous and durable leather in existence.
The Correction:
- Thread Tangling: If your thread knots, it is likely over-waxed. Run it through your fingers to generate heat and strip excess wax.
- Misaligned Holes: If your awl exits the back at an angle, use a stitching pony to ensure your workpiece is perfectly vertical.
- Rough Edges: If the burnish looks fuzzy, you did not sand enough. Go back to 400-grit sandpaper and work up to 1000-grit before re-slicking.
Studio Organization: Store your leather hides rolled, never folded, to prevent permanent creasing of the grain. Keep your brass hardware in airtight poly bags to prevent premature tarnishing before the project even begins.
THE FINAL REVEAL
Look at that! The way the hand-stitched thread creates a perfect "slant" across the leather is a hallmark of true craftsmanship. When you slide that solid brass pin into the hand-punched hole, there is no wiggle, no cheapness, just pure mechanical harmony. This belt is now a tool. It is a piece of wearable engineering that will outlast almost everything else in your wardrobe. You have successfully navigated the physics of tension, friction, and material science to create something truly iconic.
STUDIO QUESTIONS
Why is solid brass better than plated steel?
Solid brass is a non-ferrous alloy that will never rust. Unlike plated metals, it wont chip or flake over time. Instead, it develops a unique patina while maintaining its full structural density and high tensile strength.
Do I really need to use two needles?
Yes. The two-needle saddle stitch creates an interlocking bond that a single needle cannot achieve. If one stitch is cut, the rest of the seam remains completely secure, ensuring the belt never unravels under pressure.
What is the best thread for leather belts?
Waxed polyester or braided nylon are the industry standards. These synthetic fibers have high abrasion resistance and do not stretch or rot when exposed to sweat and moisture, unlike natural cotton or linen threads.
How do I stop the leather from stretching?
Choosing a high-quality vegetable-tanned "butt" or "shoulder" cut is key. These areas of the hide have the tightest fiber orientation, naturally resisting the longitudinal "creep" that happens with lower-quality belly leathers over years of use.
Can I use a regular sewing machine?
Most home machines cannot handle 9-ounce leather. Even industrial machines use a "lockstitch" which is structurally inferior to the hand-sewn saddle stitch. Hand stitching allows for much higher thread tension and better long-term durability.

