
Imagine the scent of ancient Mediterranean hillsides combined with the sharp, metallic tang of a freshly sharpened rasp. That is the aroma of potential. When I first considered the art of carving a pipe from briar, I was not just looking for a hobby; I was looking for a battle with one of the most stubborn materials on the planet. Briar is not just wood. It is the root burl of the Erica arborea shrub, a dense, fire-resistant miracle of nature that grows in rocky, arid soil. Because it grows underground, it absorbs minerals that give it a unique, stone-like density and an incredible resistance to heat. Holding a raw block of briar feels like holding a piece of history. It is heavy, cool to the touch, and surprisingly abrasive. You can feel the grain patterns screaming to be released from their dusty prison. This project is about more than just a smoking tool; it is a masterclass in structural integrity and thermal dynamics. We are going to transform this rugged burl into a sleek, functional masterpiece that defies the very fire it contains.
THE STUDIO KIT
To master this craft, your workbench needs to look like a cross between a surgeon's theater and a sculptor's studio. The star of the show is the Ebauchon block, a rugged chunk of briar pre-cut into a rough trapezoid. You will need a high-speed rotary tool with various carbide burrs for the initial shaping, but the real soul comes from your precision rasps and needle files. These tools allow you to feel the resistance of the wood fibers as you strip them away. For the internal mechanics, a standard drill press is non-negotiable; you need absolute perpendicularity to ensure the airway meets the tobacco chamber at a perfect tangent.
You also need a digital caliper to measure wall thickness. In the world of pipe making, a millimeter is the difference between a cool smoke and a burnt palm. For the stem, we use vulcanite or ebonite rods, which are hard rubber compounds that offer excellent tensile strength and a comfortable "bite" for the user. If you are looking for Material Substitutions, you can practice your shaping on cherry or pear wood. While these lack the extreme heat resistance of briar, they offer a similar porous structure that is forgiving for beginners. However, for a professional finish, nothing beats the capillary action of high-grade carnauba wax used during the final buffing stage.
THE TEMPO
The "Maker's Rhythm" is a psychological state where time dilates. For this project, do not expect a quick win. The initial Engineering Phase (drilling the internal channels) takes about two hours of intense, high-focus work. If you rush the drilling, you risk cracking the burl due to internal stresses. The Sculpting Phase is the longest stretch, often requiring ten to fifteen hours of manual labor. This is where you find your flow, moving from aggressive wood removal to the delicate refinement of the "stovetop" or "shank." Finally, the Finishing Phase (sanding and polishing) takes another five hours. We move through sandpaper grits like a ladder, starting at 120 and climbing all the way to 2000. This slow progression is vital because it closes the pores of the wood, creating a surface so smooth it feels like polished marble.
THE CORE METHOD
1. Mapping the Internal Airway
Before a single shaving falls, you must use a pencil and your calipers to map the "draft hole" and the "tobacco chamber." The two must intersect at the very bottom of the bowl to ensure a complete burn.
Mastery Tip: This intersection relies on fluid dynamics. If the draft hole is too high, unburnt tobacco creates moisture buildup; if it is too low, you compromise the structural integrity of the bowl's floor.
2. The Precision Bore
Using a spade bit modified with a rounded profile, drill the tobacco chamber. Follow this by drilling the airway through the shank using a long, aircraft-length drill bit.
Mastery Tip: Heat is your enemy here. Drill in short bursts to prevent "checking" or small heat-induced cracks. The thermal expansion of the wood can cause the bit to bind, potentially shattering a premium block.
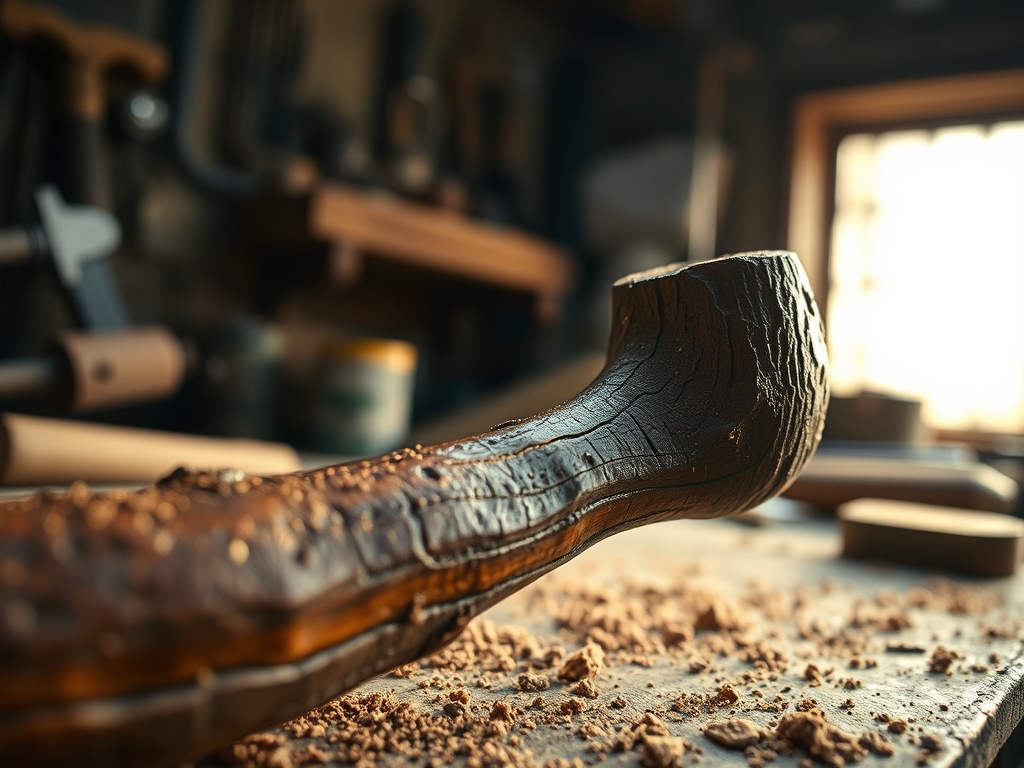
3. Rough Shaping with the Rotary Tool
Once the holes are set, use an oscillating tool or a rotary carver to remove the bulk of the waste material. Follow the "grain orientation" to highlight "birdseye" or "straight grain" patterns.
Mastery Tip: Always leave at least 5mm of wall thickness during this stage. This provides a safety buffer against lateral stress and allows for further refinement during the hand-filing stage.
4. Refining the Ergonomics
Transition to hand rasps to shape the "button" of the stem and the "transition" where the bowl meets the shank. This is where the pipe becomes ergonomic, fitting the natural curve of the hand and the jaw.
Mastery Tip: Use a "light-box" to check for symmetry. The human eye is incredibly sensitive to asymmetrical deviations in curved surfaces; checking the silhouette against a bright background reveals hidden lumps.
5. The Progressive Sanding Sequence
Start with 150 grit to remove tool marks, then move through 220, 400, 600, and finally 1000+ grit. Between each grit, wipe the wood with denatured alcohol to "raise the grain."
Mastery Tip: Raising the grain utilizes hygroscopy. The liquid swells the compressed fibers, allowing you to sand them flat so the finish remains glass-smooth even after the pipe gets warm during use.
6. The Final Burnish
Apply a thin coat of leather dye to highlight the grain, sand it back lightly, then apply carnauba wax using a high-speed muslin buffing wheel.
Mastery Tip: Carnauba wax has a high melting point. The friction of the buffing wheel creates enough heat to liquefy the wax, allowing it to penetrate the micro-pores of the briar, creating a durable, breathable seal.
THE TECHNICAL LEDGER
Maintenance & Longevity: Briar is hardy but not invincible. After every use, run a pipe cleaner through the stem to remove moisture. This prevents the porous fibers from souring. Never clean a warm pipe with liquid; wait for it to reach ambient temperature to avoid thermal shock.
Material Variations:
- Sustainable: Morta (bog oak) is a fantastic eco-friendly alternative; it is semi-fossilized wood with high mineral content.
- Premium: Plateau briar features the "natural edge" of the burl, offering a rugged, "craggy" aesthetic.
- Recycled: Repurposed olive wood offers a beautiful grain but requires a slower "break-in" period due to its oil content.
The Correction:
- The Gap: If the stem does not fit flush against the shank, use a facing tool to square the end of the briar. A perfectly flat surface is required for a vacuum-tight seal.
- The Over-drill: If you drill the airway too deep, you can "plug" it with a tiny piece of briar and re-drill. This is a surgical fix that requires precision alignment.
- The Scratch: If deep scratches appear after staining, you must drop back two sanding grits. Do not try to "buff it out"; you will only create an uneven surface.
Studio Organization: Store your briar blocks in a climate-controlled environment. Extreme humidity changes can cause the wood to expand and contract, leading to micro-fractures in the grain. Use labeled bins to separate your vulcanite stems from your acrylic ones, as vulcanite can oxidize if exposed to prolonged UV light.
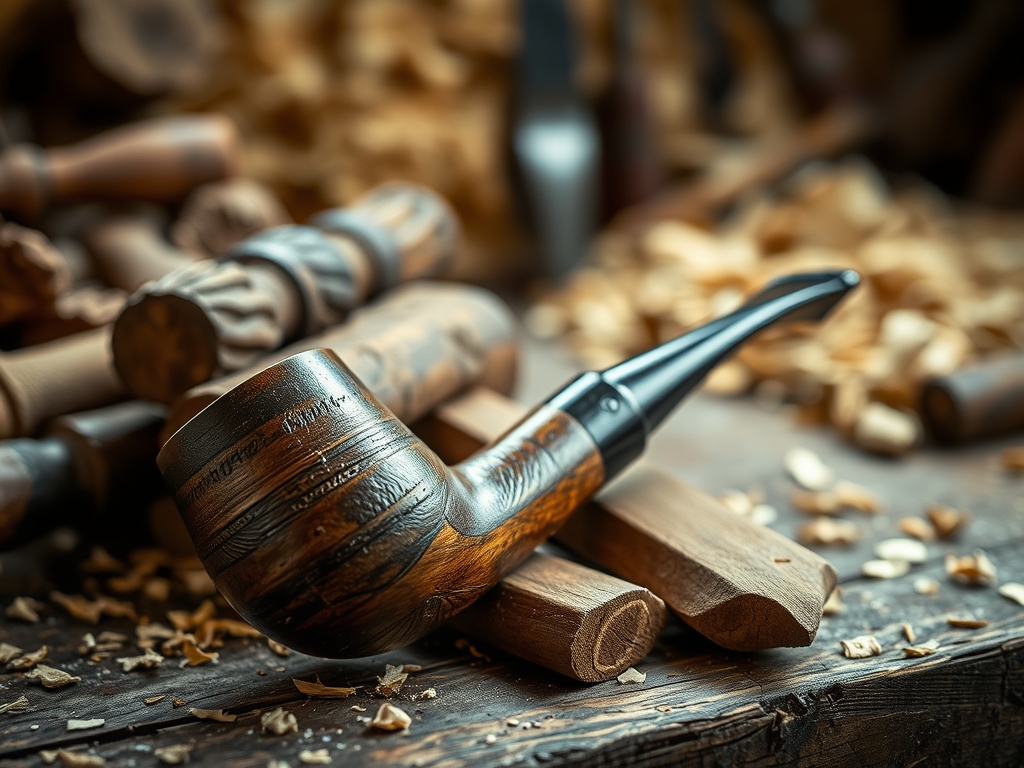
THE FINAL REVEAL
Look at that finish! The way the light dances across the "flame grain" is nothing short of magical. We started with a dusty, lumpy root and ended with a sophisticated piece of functional art. The weight is perfectly balanced between the bowl and the bit; the transition is seamless; and the internal engineering ensures a perfect draw every time. There is a profound sense of satisfaction in knowing that every curve was dictated by your hands and every internal channel was calculated for maximum efficiency. You have not just made a pipe; you have mastered the tactile physics of briar. Go ahead, hold it up to the light and admire that carnauba glow. You earned it!
STUDIO QUESTIONS
Why is briar used for pipes instead of other woods?
Briar is uniquely fire-resistant and highly porous, allowing it to absorb moisture and oils from tobacco. Its dense structure prevents the wood from burning through, while the grain provides incredible structural integrity under high thermal stress.
What happens if the airway is not centered?
An off-center airway disrupts the laminar flow of smoke, causing turbulence. This results in "hot spots" within the bowl, which can lead to uneven burning of the tobacco and potential damage to the pipe's internal walls over time.
Can I use regular wood glue for repairs?
No. Standard wood glues cannot withstand the thermal cycling of a smoker. If a repair is needed, specialized high-heat epoxies or "briar dust and cyanoacrylate" mixtures are used to ensure the bond remains stable at high temperatures.
How do I prevent the stem from oxidizing?
Vulcanite stems oxidize when exposed to UV light and oxygen, turning a dull grey. To prevent this, apply a thin coat of obsidian oil or food-grade mineral oil regularly to create a protective barrier against atmospheric moisture and light.

