
Close your eyes and listen to that hollow, tinny rattle your workshop door makes every time it swings shut. It is pathetic, right? We are fixing that today by injecting some serious gravitational soul into your entryway. We are Forging a Metal Door Handle that feels like it was stolen from a medieval fortress but performs with modern precision. This is not just about aesthetics; it is about the tactile feedback of high carbon steel meeting your palm. When you grab a handle with real mass, your brain registers that you are entering a space of creation. We are going to manipulate molecular structures and fight thermal expansion to create something that outlasts the building itself. Grab your safety gear because we are about to turn a raw, industrial rod into a piece of functional art that demands respect.
THE STUDIO KIT
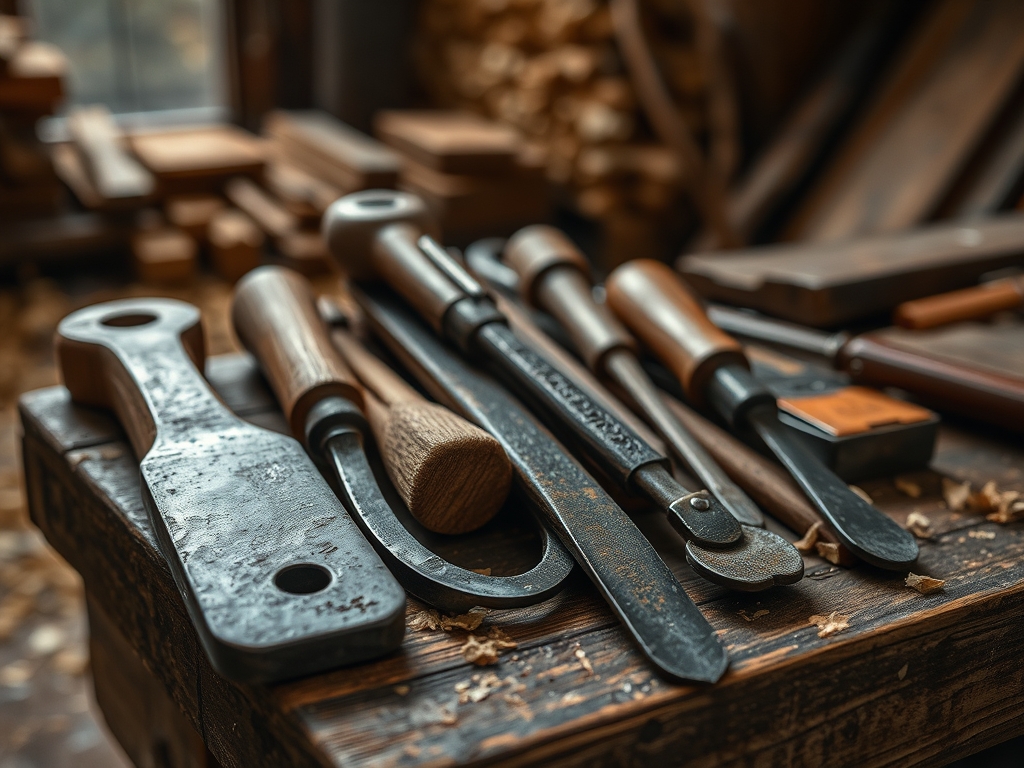
To master this build, your workbench needs more than just a hammer. We are looking for wrought iron or low-carbon mild steel for the base material because of its excellent ductility and forgiveness during the heating cycles. You will need a gas or coal forge capable of reaching 2,000 degrees Fahrenheit to hit that sweet spot of plastic deformation. For the shaping, a 2.5-pound cross-peen hammer is your primary driver, while a hardy tool or a hot chisel will handle the surgical cuts.
You must have digital calipers on hand to ensure your mounting holes are perfectly symmetrical; precision is what separates a master smith from a hobbyist. For the finishing touches, a wire wheel and beeswax are essential for creating a corrosion-resistant burnish.
Material Substitutions: If you cannot source mild steel, look for reclaimed rebar. While the tensile strength varies due to the recycled impurities, the ribbed texture provides a brutalist aesthetic that looks incredible once you taper the ends. If you lack a forge, a high-output oxy-acetylene torch can provide localized heat, though it requires more patience to achieve a uniform thermal soak.
THE TEMPO
Forging is all about the Maker's Rhythm. You cannot rush the molecules. Expect to spend approximately 45 minutes on the initial tapering and squaring of your stock. This is the most physically demanding phase where you establish the ergonomic profile. The sculpting and scrolling phase takes another 30 minutes; this is where the artistic flair happens and requires a lighter touch to avoid over-thinning the metal. Finally, the drilling, finishing, and quenching will take about 20 minutes. Total active time is roughly two hours, but the cooling periods are the perfect time to reorganize your workspace or prep your mounting hardware.
THE CORE METHOD
1. The Initial Heat and Taper
Start by heating the end of your steel rod until it reaches a bright cherry red, approximately 1,500 degrees. Place the tip on the edge of the anvil and strike with consistent, overlapping blows to create a four-sided taper.
Mastery Tip: This process relies on displacing mass rather than removing it. By hammering the corners first, you increase the structural integrity of the tip, preventing the metal from "mushrooming" or developing cold shuts which are internal fractures that weaken the handle.
2. Squaring the Shank
Once the taper is set, work back toward the center of the handle. You want to transform the round stock into a square profile. This increases the moment of inertia, making the handle significantly more resistant to bending forces when you pull on it.
Mastery Tip: Use the physics of thermal conductivity to your advantage. Keep the section you are working on hot, but keep the "holding" end cool by occasionally dipping just the tip in the slack tub. This maintains a rigid base while the work area remains malleable.
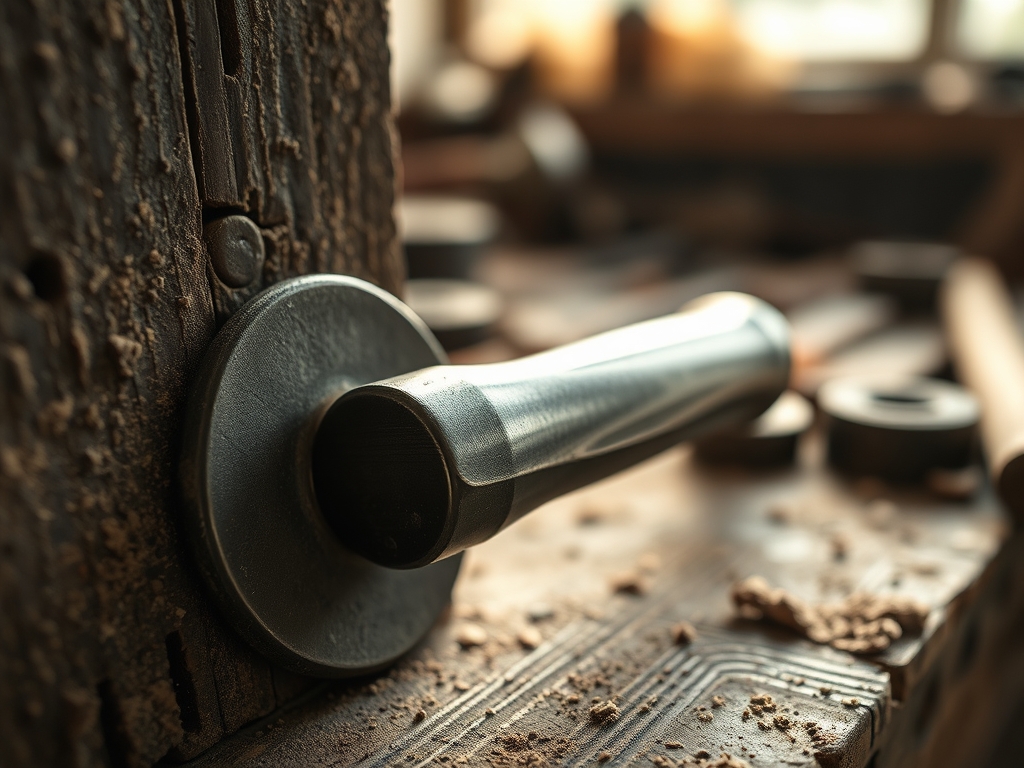
3. Drawing Out the Flanges
The ends of your handle need to be flattened into "leaves" or flanges where they will meet the door. Use the peen of your hammer to spread the metal outward. This increases the surface area for the mounting screws, distributing the mechanical stress across a wider portion of the wood.
Mastery Tip: Watch for surface tension cracks along the edges. If the metal gets too thin while it is too cold, it will split. Always return the piece to the forge the moment it fades to a dull red to maintain atomic fluidity.
4. The Ergonomic Arch
This is the "style" part of the project. Using a mandrel or the horn of the anvil, gently curve the center of the shank into a comfortable "C" or "U" shape. Ensure the distance between the handle and the door provides enough clearance for a gloved hand.
Mastery Tip: Use calipers to check the depth of the arch. A consistent radius ensures that the load path is centered, preventing the handle from twisting or loosening over years of high-traffic use.
5. Punching and Finishing
While the flanges are still at a dull heat, use a center punch to mark your holes, then drill them out once the metal has cooled. Finally, reheat the entire piece to a low blue heat and rub it down with natural beeswax.
Mastery Tip: The beeswax creates a polymerized coating that bonds with the porous surface of the hot iron. This prevents oxidation (rust) better than most paints while highlighting the unique hammer marks of your forge work.
THE TECHNICAL LEDGER
Maintenance & Longevity:
Wrought iron is incredibly durable but susceptible to moisture. Every six months, apply a thin coat of paste wax or linseed oil. This maintains the hydrophobic barrier and keeps the "hand-feel" smooth rather than sticky.
Material Variations:
- Sustainable: Use salvaged leaf springs from old trucks; the chromium-alloy content makes for an incredibly tough, springy handle.
- Premium: Incorporate a copper inlay by chiseling a groove and hammering in a copper wire. The galvanic reaction is minimal if kept dry, and the color contrast is stunning.
The Correction:
- The Over-Thin Flange: If you hammer a mounting point too thin, do not try to "thick it up." Cut it off, upset the end (hammering it back into itself to gain thickness), and restart the taper.
- The Uneven Arch: If the handle is lopsided, reheat only the apex of the curve. Use a soft-faced mallet against the anvil horn to nudge the symmetry back without marring your decorative hammer marks.
- The Drifting Hole: If your drill bit wanders, use a round needle file to pull the hole back to center. A slightly elongated hole is better than a crooked handle.
Studio Organization:
Store your raw steel stock horizontally on a rack off the floor to prevent pitting corrosion. Keep your hammers organized by weight on a magnetic strip or dedicated tool board to maintain a fast workflow during those critical "heat" windows.
THE FINAL REVEAL
Look at that! You have just transformed a cold, lifeless piece of industrial scrap into a high-mass, high-style masterpiece. The way the light catches those hand-hammered facets is pure magic. When you bolt this onto your shop door, you are not just adding a handle; you are adding a signature. The weight feels substantial, the texture is tactile and grippy, and the overall presence screams "a pro works here." This is the ultimate upgrade for any maker space!
STUDIO QUESTIONS
What is the best steel for a beginner smith?
Mild steel (A36) is the gold standard. It has a wide forging window, meaning it stays workable at lower temperatures than high-carbon steels, and it is inexpensive for practicing your tapering and displacing mass techniques.
How do I prevent the handle from rusting?
The most effective studio method is a heat-blackened finish. Reheat the finished handle to approximately 400 degrees and apply a coat of beeswax or boiled linseed oil. This creates a durable, non-porous carbonized layer.
Why did my metal crack during the bend?
You likely experienced work hardening. If you hammer steel after it has cooled below its critical temperature, the internal grains become stressed and brittle. Always return the piece to the forge when the incandescence fades.
Can I forge a handle without an anvil?
You need a high-density striking surface. A large section of railroad track or a heavy block of scrap steel can serve as an improvised anvil, provided it has enough mass to reflect the energy of your hammer blows.
What size mounting screws should I use?
For a heavy forged handle, use #12 or #14 stainless steel lag screws. Ensure the pilot hole is slightly smaller than the screw's shank to maximize thread engagement and prevent the heavy handle from sagging over time.

