
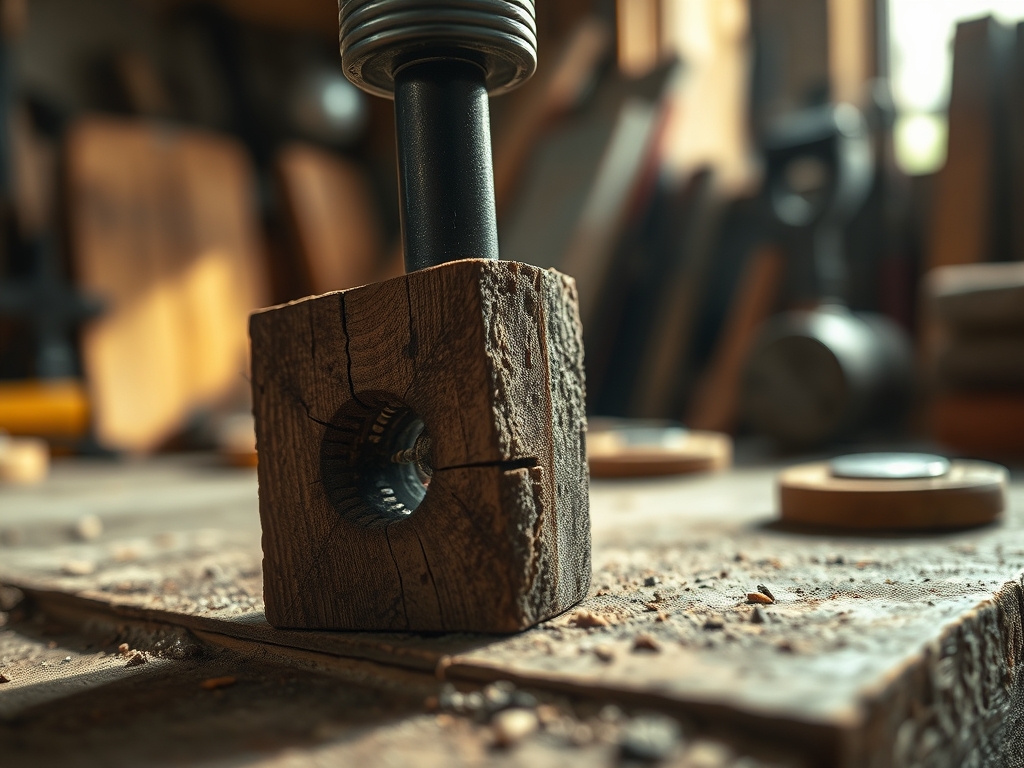
Imagine the scent of freshly sheared wood fibers mingling with the metallic tang of cold steel. You are standing over a slab of white oak that is three inches thick; it is dense, stubborn, and possesses a lignin structure that laughs at cheap hardware store drills. There is no hum of electricity here. Instead, there is only the rhythmic, clicking heartbeat of the ratchet. Using a Bit Brace for Large Holes is not just a survivalist trope; it is a masterclass in human-powered mechanical advantage. As you lean your weight into the head of the brace, you feel the lead screw of the auger bit bite into the summerwood. The resistance is tactile and immense. You are not just making a hole; you are engaging in a high-stakes negotiation with the tensile strength of a centuries-old tree. Every rotation of the sweep handle translates your physical energy into a spiraling force that shears through the grain, pulling up thick, curly ribbons of oak that feel warm to the touch from the sheer friction of the cut.
THE STUDIO KIT
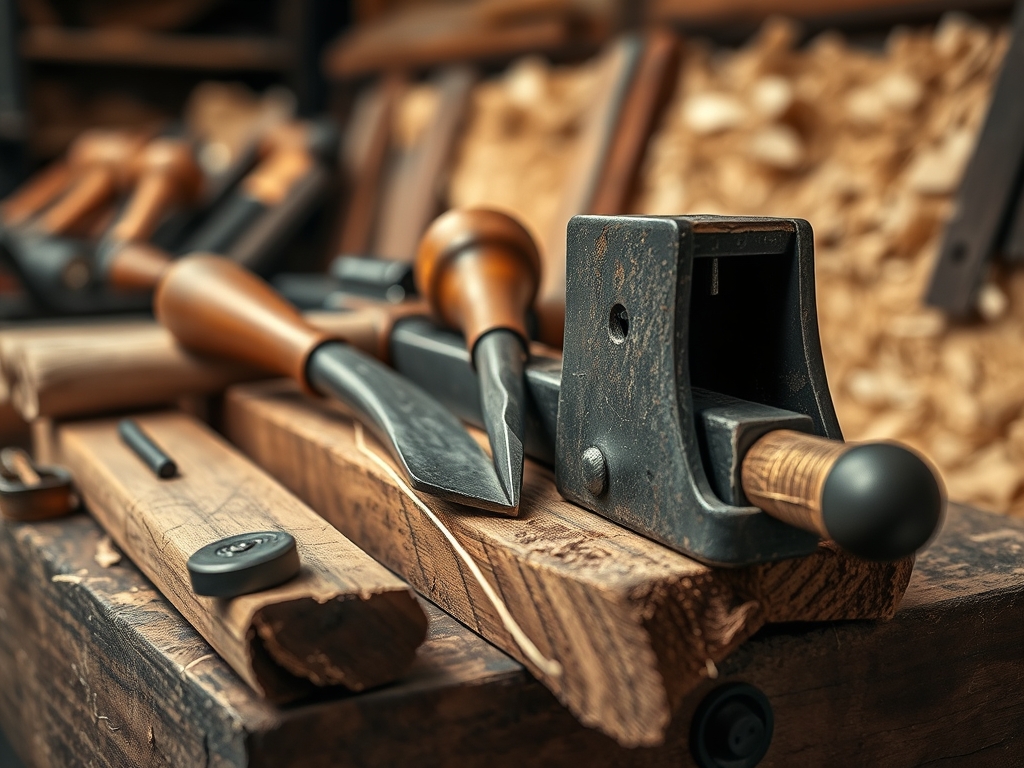
To conquer a material as unforgiving as thick oak, your kit must be curated with precision. The centerpiece is a ten-inch swing bit brace with a ball-bearing head. This tool utilizes a simple crank mechanism to multiply the torque your arm produces. You will need a set of Jennings-pattern auger bits, specifically chosen for their double-thread lead screws which excel in hardwoods. Unlike modern spade bits, these bits feature spurs that scribe the circumference of the hole before the lifters remove the waste, preventing the grain from splintering.
You should also have a marking awl for creating a starter dimple and a set of calipers to verify the diameter of your bit. For the material, we are focusing on quarter-sawn white oak due to its closed cellular structure and high density. If you cannot source oak, a suitable Material Substitution would be hard maple or hickory; both offer similar resistance and require the same level of torque management. Avoid softwoods like pine for this specific exercise, as their low fiber density allows the lead screw to "strip" the wood rather than pulling the bit through. Finally, keep a block of paraffin wax nearby. Coating the flutes of the bit reduces the coefficient of friction, preventing the tool from seizing mid-cut.
THE TEMPO
The "Maker's Rhythm" in manual boring is a slow-burn marathon, not a sprint. Expect to spend approximately five minutes on layout and calibration, where you ensure your entry point is perfectly perpendicular to the grain. The actual boring phase for a two-inch deep hole in oak will take between eight to twelve minutes of consistent rotation. You must account for thermal expansion; if you rotate too quickly, the friction heat can actually cause the wood fibers to swell, gripping the bit and making it nearly impossible to turn.
I categorize this process into three distinct tempos: the Engagement Phase (slow, high pressure), the Clearing Phase (steady, rhythmic rotation), and the Exit Phase (ultra-slow to prevent blowout). Total time per hole, including tool maintenance and chip clearance, is roughly twenty minutes. This pace allows you to monitor the structural integrity of the wood and adjust your angle in real time, something a high-speed motor would never permit.
THE CORE METHOD
1. The Precision Indentation
Before the brace even touches the wood, use your marking awl to create a deep, centered pilot point. Because oak is so dense, the lead screw of an auger bit needs a pre-defined path to prevent it from wandering across the earlywood rings.
Mastery Tip: This step utilizes the principle of point-loading. By concentrating force on a microscopic area, you overcome the surface tension of the wood, ensuring the bit remains centered even when the grain direction shifts.
2. Setting the Lead Screw
Place the lead screw in the indentation and hold the brace perfectly vertical. Apply downward pressure on the head with your forehead or non-dominant hand. Rotate the sweep handle clockwise until the spurs make contact with the surface.
Mastery Tip: The lead screw acts as a mechanical puller. In hardwoods, the pitch of the thread determines the "feed rate." If the screw loses its grip, the bit stops advancing, a phenomenon known as "thread stripping" in the wood fibers.
3. Scribing the Circumference
As you begin the full rotation, the spurs will cut a clean circle into the oak. This is the most critical part of the cut. You want a clean, deep score before the horizontal lifters start hogging out the bulk material.
Mastery Tip: This technique manages shearing stress. By severing the long-chain cellulose fibers on the perimeter first, you prevent the rotating bit from "tearing" the grain outside the desired diameter.
4. The Rhythmic Boring
Once the spurs are submerged, settle into a steady circular motion. Every four or five turns, reverse the brace a half-turn to break the chips and then pull the bit upward slightly to clear the flutes of debris.
Mastery Tip: This prevents chip compaction. When waste material is trapped in the flutes, it increases the internal pressure against the walls of the hole, which can lead to radial cracking in the oak.
5. Managing the Breakthrough
If you are boring all the way through, listen for a change in the "crunch" of the wood. When the lead screw pokes through the bottom, stop. Flip the board over and finish the hole from the opposite side.
Mastery Tip: This avoids exit-side splintering. By cutting from both sides, the "show" faces of your wood are protected by the internal mass of the board, maintaining the geometric precision of the exit hole.
THE TECHNICAL LEDGER
Maintenance & Longevity: Your bit brace is a vintage marvel, but its ratchet pawls need love. Apply a drop of machine oil to the gearing every six months. For the bits, use a tapered file to sharpen the inside of the spurs; never file the outside, or you will change the cutting diameter and cause the bit to bind.
Material Variations: While we love oak for its porous yet strong nature, working with recycled barn wood requires extra caution. Old oak often contains "mineral streaks" or hidden nails that can chip the high-carbon steel of your auger bits. Always scan your material with a metal detector if it has a history.
The Correction:
- The Bit is Stuck: Do not wrench it side-to-side. Apply a few drops of penetrating oil or melted wax into the hole and use the ratchet's reverse setting.
- The Hole is Crooked: This is a failure of ergonomic alignment. Use a "boring jig" (a scrap block with a pre-drilled straight hole) clamped to your workpiece to guide the bit for the first inch.
- Rough Hole Walls: This usually means your bit's lifters are dull. Use a fine-grit diamond hone to sharpen the flat underside of the cutting edge to ensure a burnished finish.
Studio Organization: Store your auger bits in a canvas roll treated with rust-inhibitor. Never store them loose in a metal drawer; the cutting edges are brittle and will dull if they clink against each other.
THE FINAL REVEAL
There is a profound sense of triumph when you pull that bit out for the last time and see a perfectly cylindrical, glass-smooth hole through three inches of solid oak. The shavings on the floor look like golden curls, and the hole itself has a burnished quality that power tools simply cannot replicate. You have mastered the physics of the inclined plane (the bit threads) and the lever (the brace handle). Your project now possesses a level of handmade soul that is palpable. You didn't just drill a hole; you conquered a material through patience and mechanical precision.
STUDIO QUESTIONS
Can I use a standard drill bit in a bit brace?
No, standard bits lack the square-tapered shank required for a brace's two-jaw chuck. You must use bits specifically designed with a four-sided tang to ensure the chuck can grip the tool under high torque.
How do I stop the oak from splitting?
Ensure you are at least two inches from the end grain. Oak's longitudinal cleavage makes it prone to splitting if the wedge-force of the bit is applied too close to the edge of the board without clamping.
Why is my bit brace clicking but not turning?
The ratchet cam is likely set to the neutral or reverse position. Adjust the selector ring near the chuck to engage the pawls for clockwise rotation, allowing for continuous movement in tight spaces.
What is the best way to sharpen an auger bit?
Use a specialized auger bit file. Only sharpen the top of the cutting lifters and the inside of the spurs. Removing metal from the outside edges will reduce the bit's diameter, causing it to seize during use.

